Supply and Demand Trading in 2026
We have been trading supply and demand strategies for over ten years, and they have stood the test of time remarkably well. Supply and demand is...
Following up with my last swing trading article, today I want to go a bit into detail about a particular setup I am trading that allows me to get in with or without price action confirmation. It is based on the confluence of Support/Resistance, Supply/Demand and the Fibonacci 50% Retracement. The principles, as always, stay the same – we trade the break & retest and aim for the last swing high/low and/or opposing S/R or S/D levels in case they get into our way.
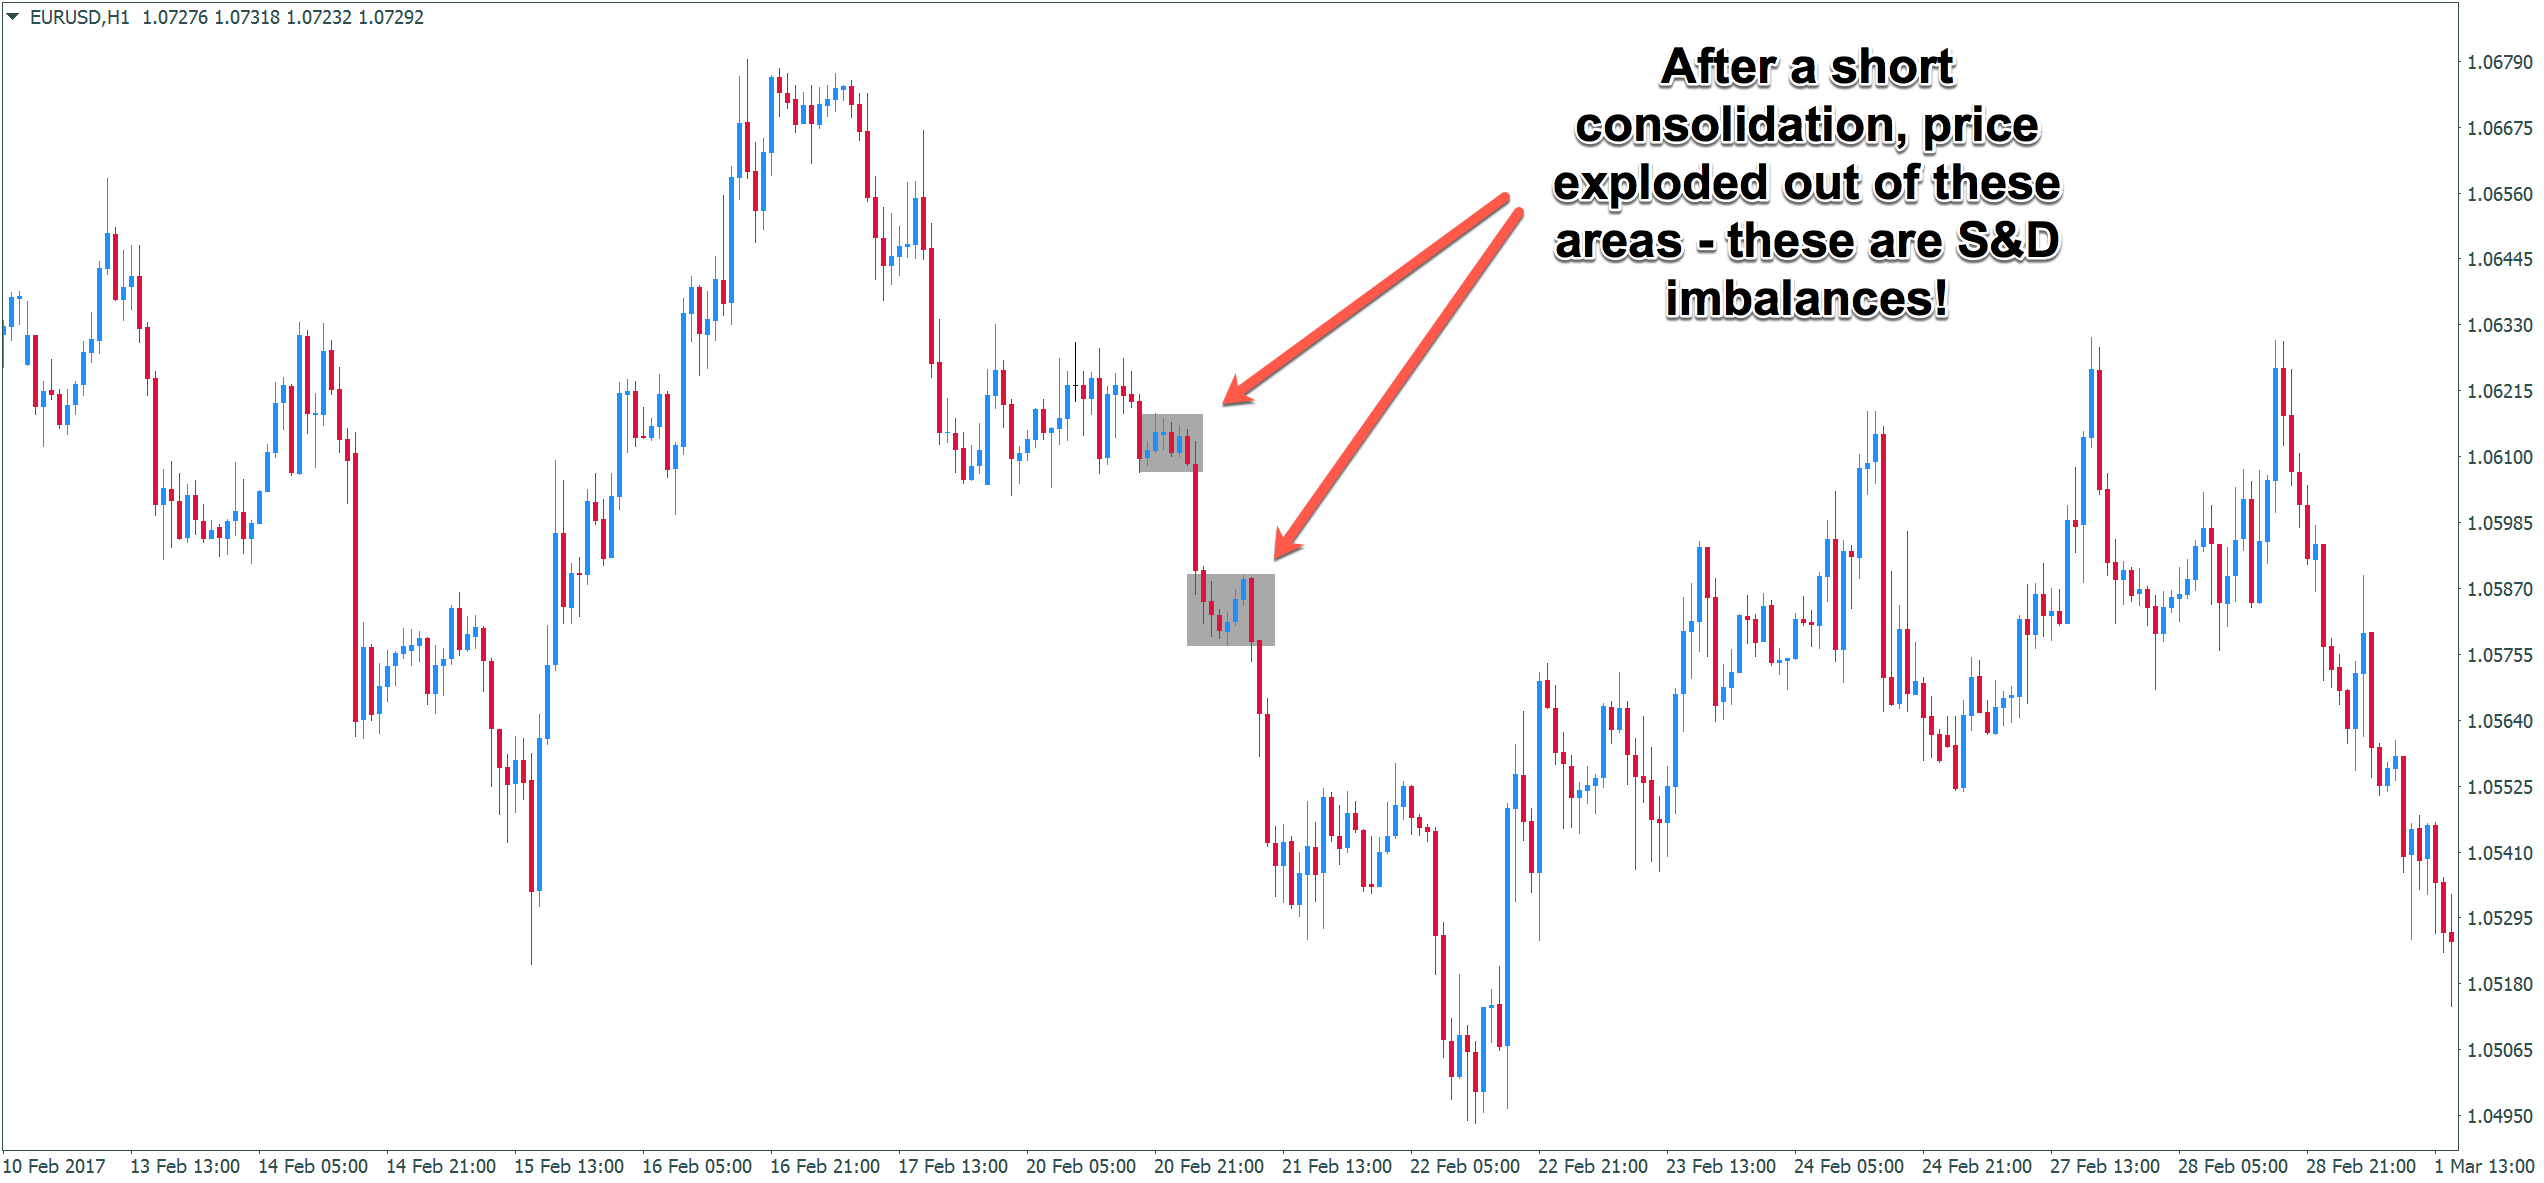
The first step to identifying this setup is to zoom out a bit on our H1 chart and to start looking for areas from which price quickly departed in an explosive manner. Here are 2 examples.

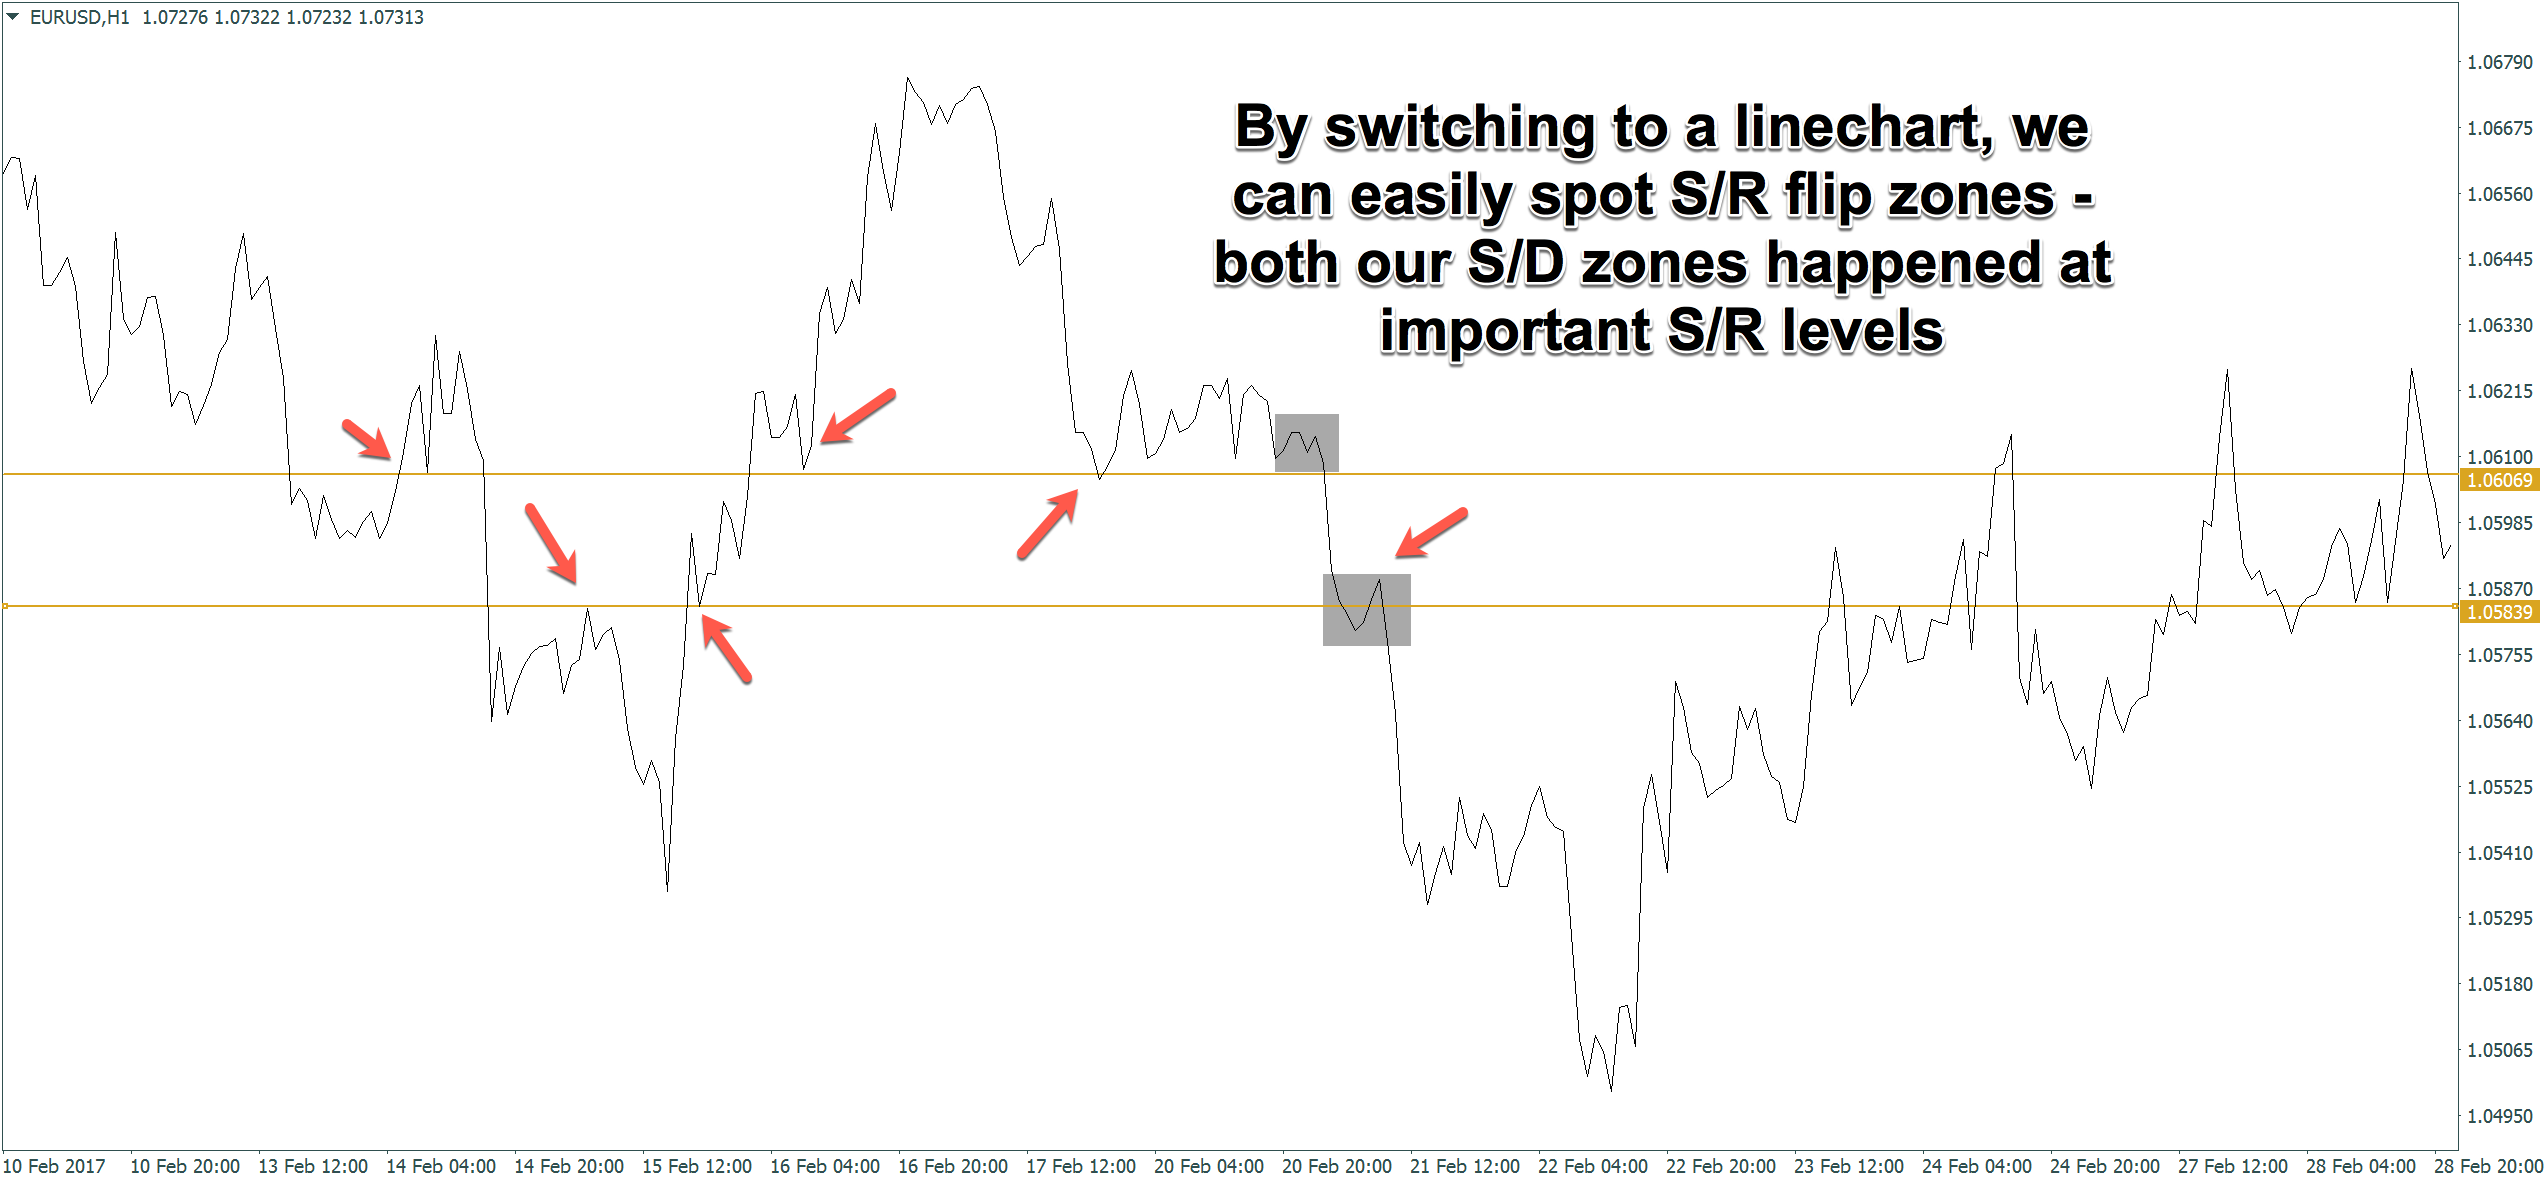
After identifying those areas, we then see whether these imbalances happened in the vicinity of Support/Resistance levels, which they often do – simply because of the nature of them (explosion out of a congested area).
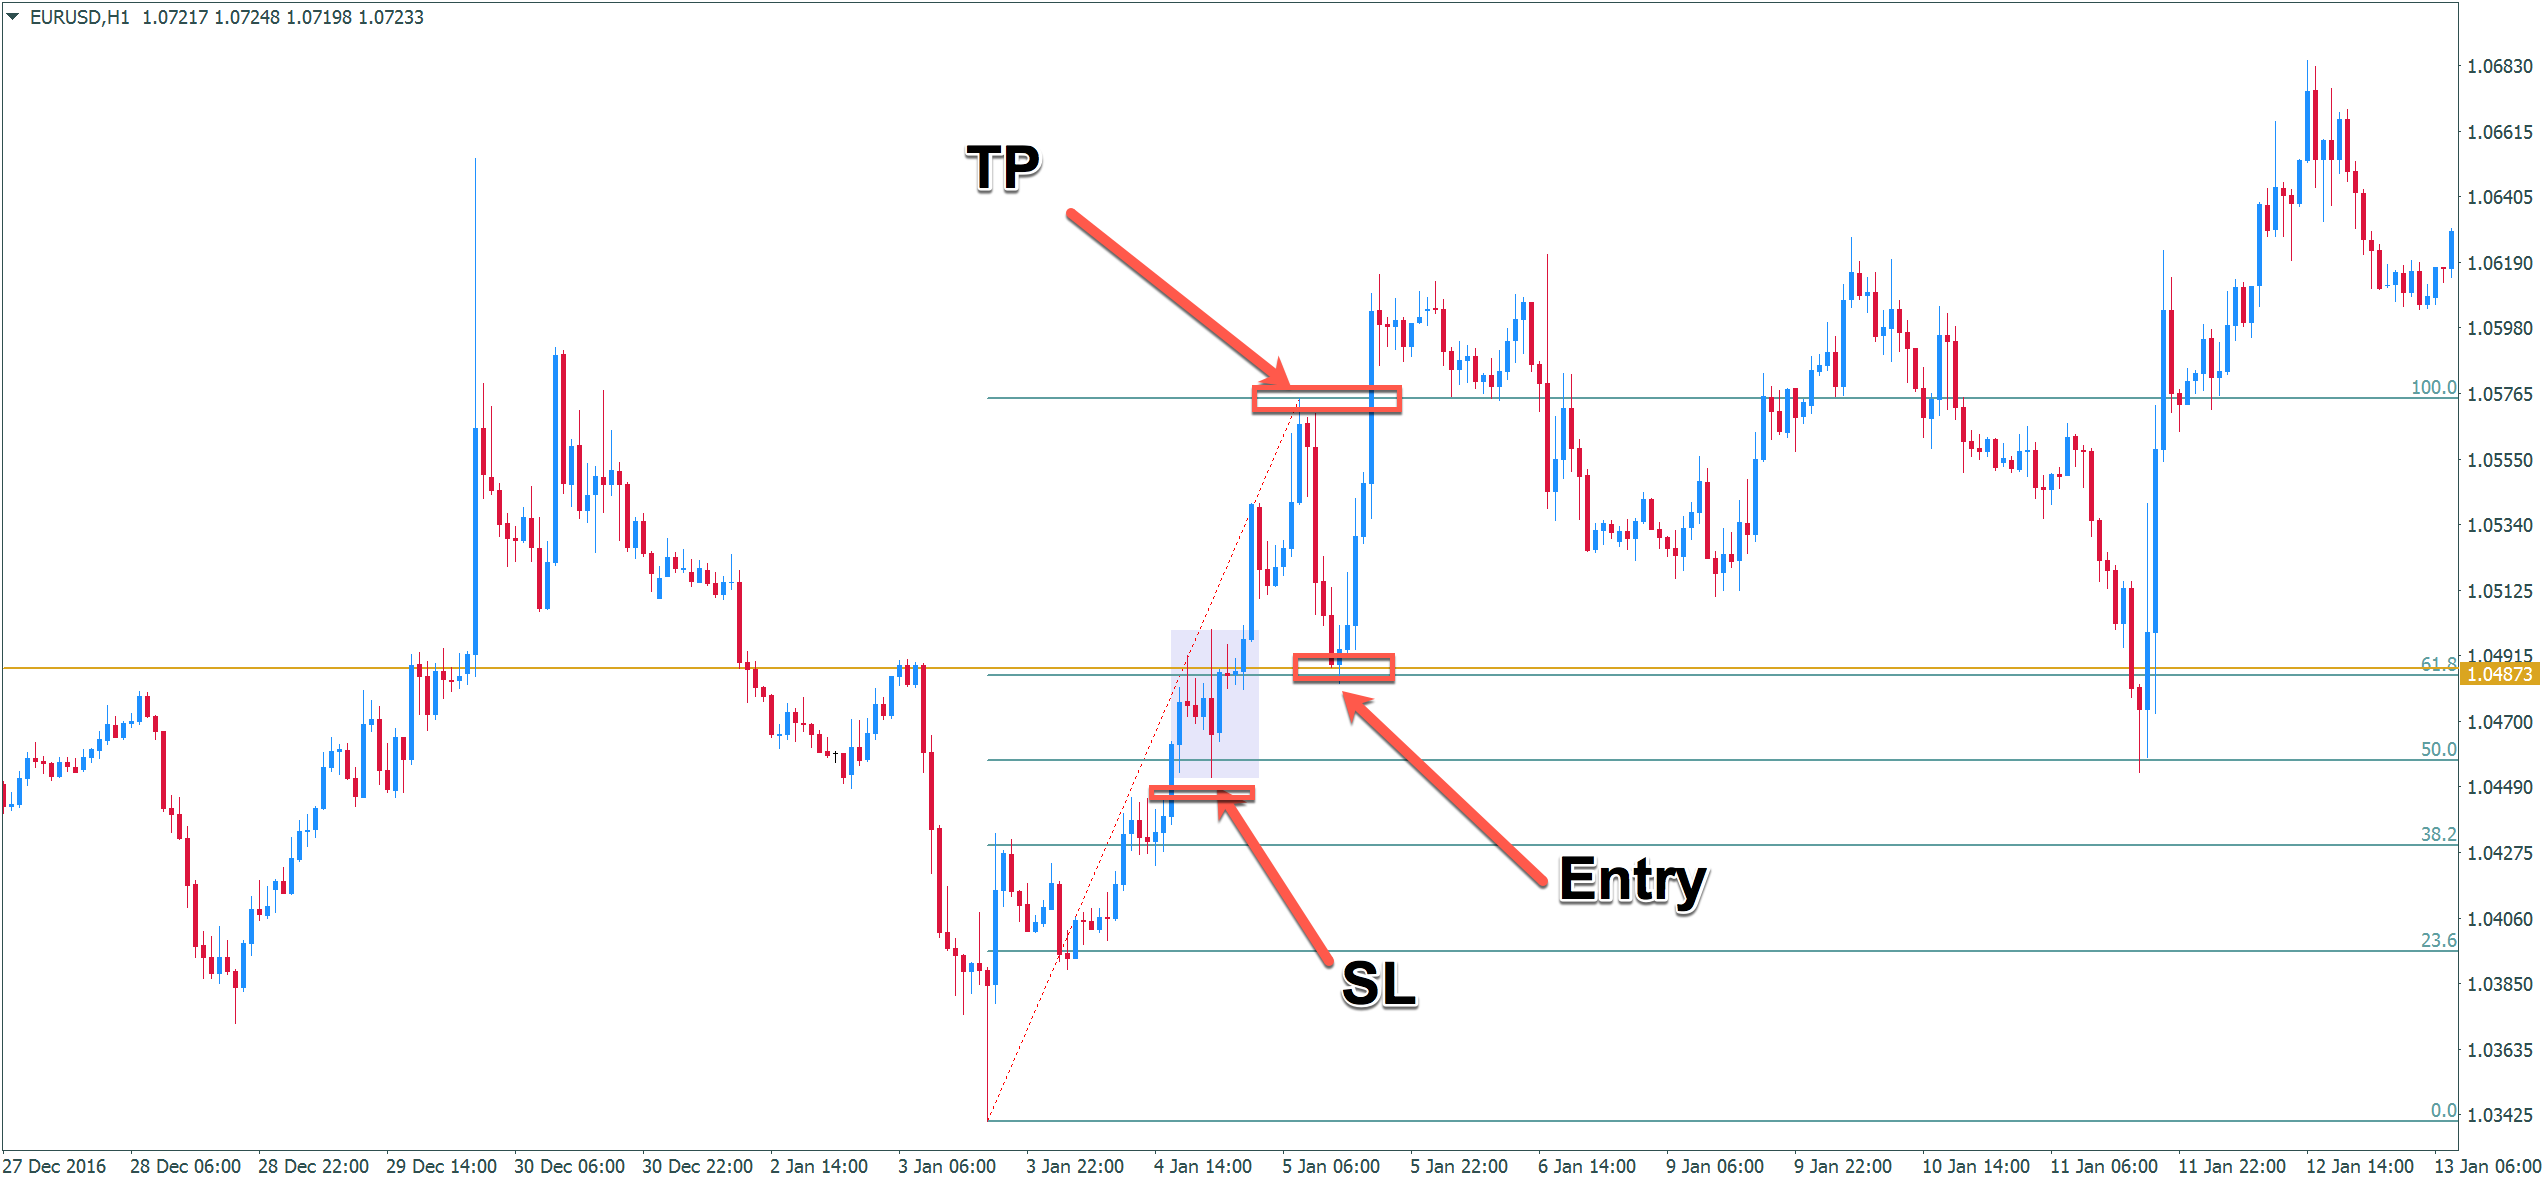
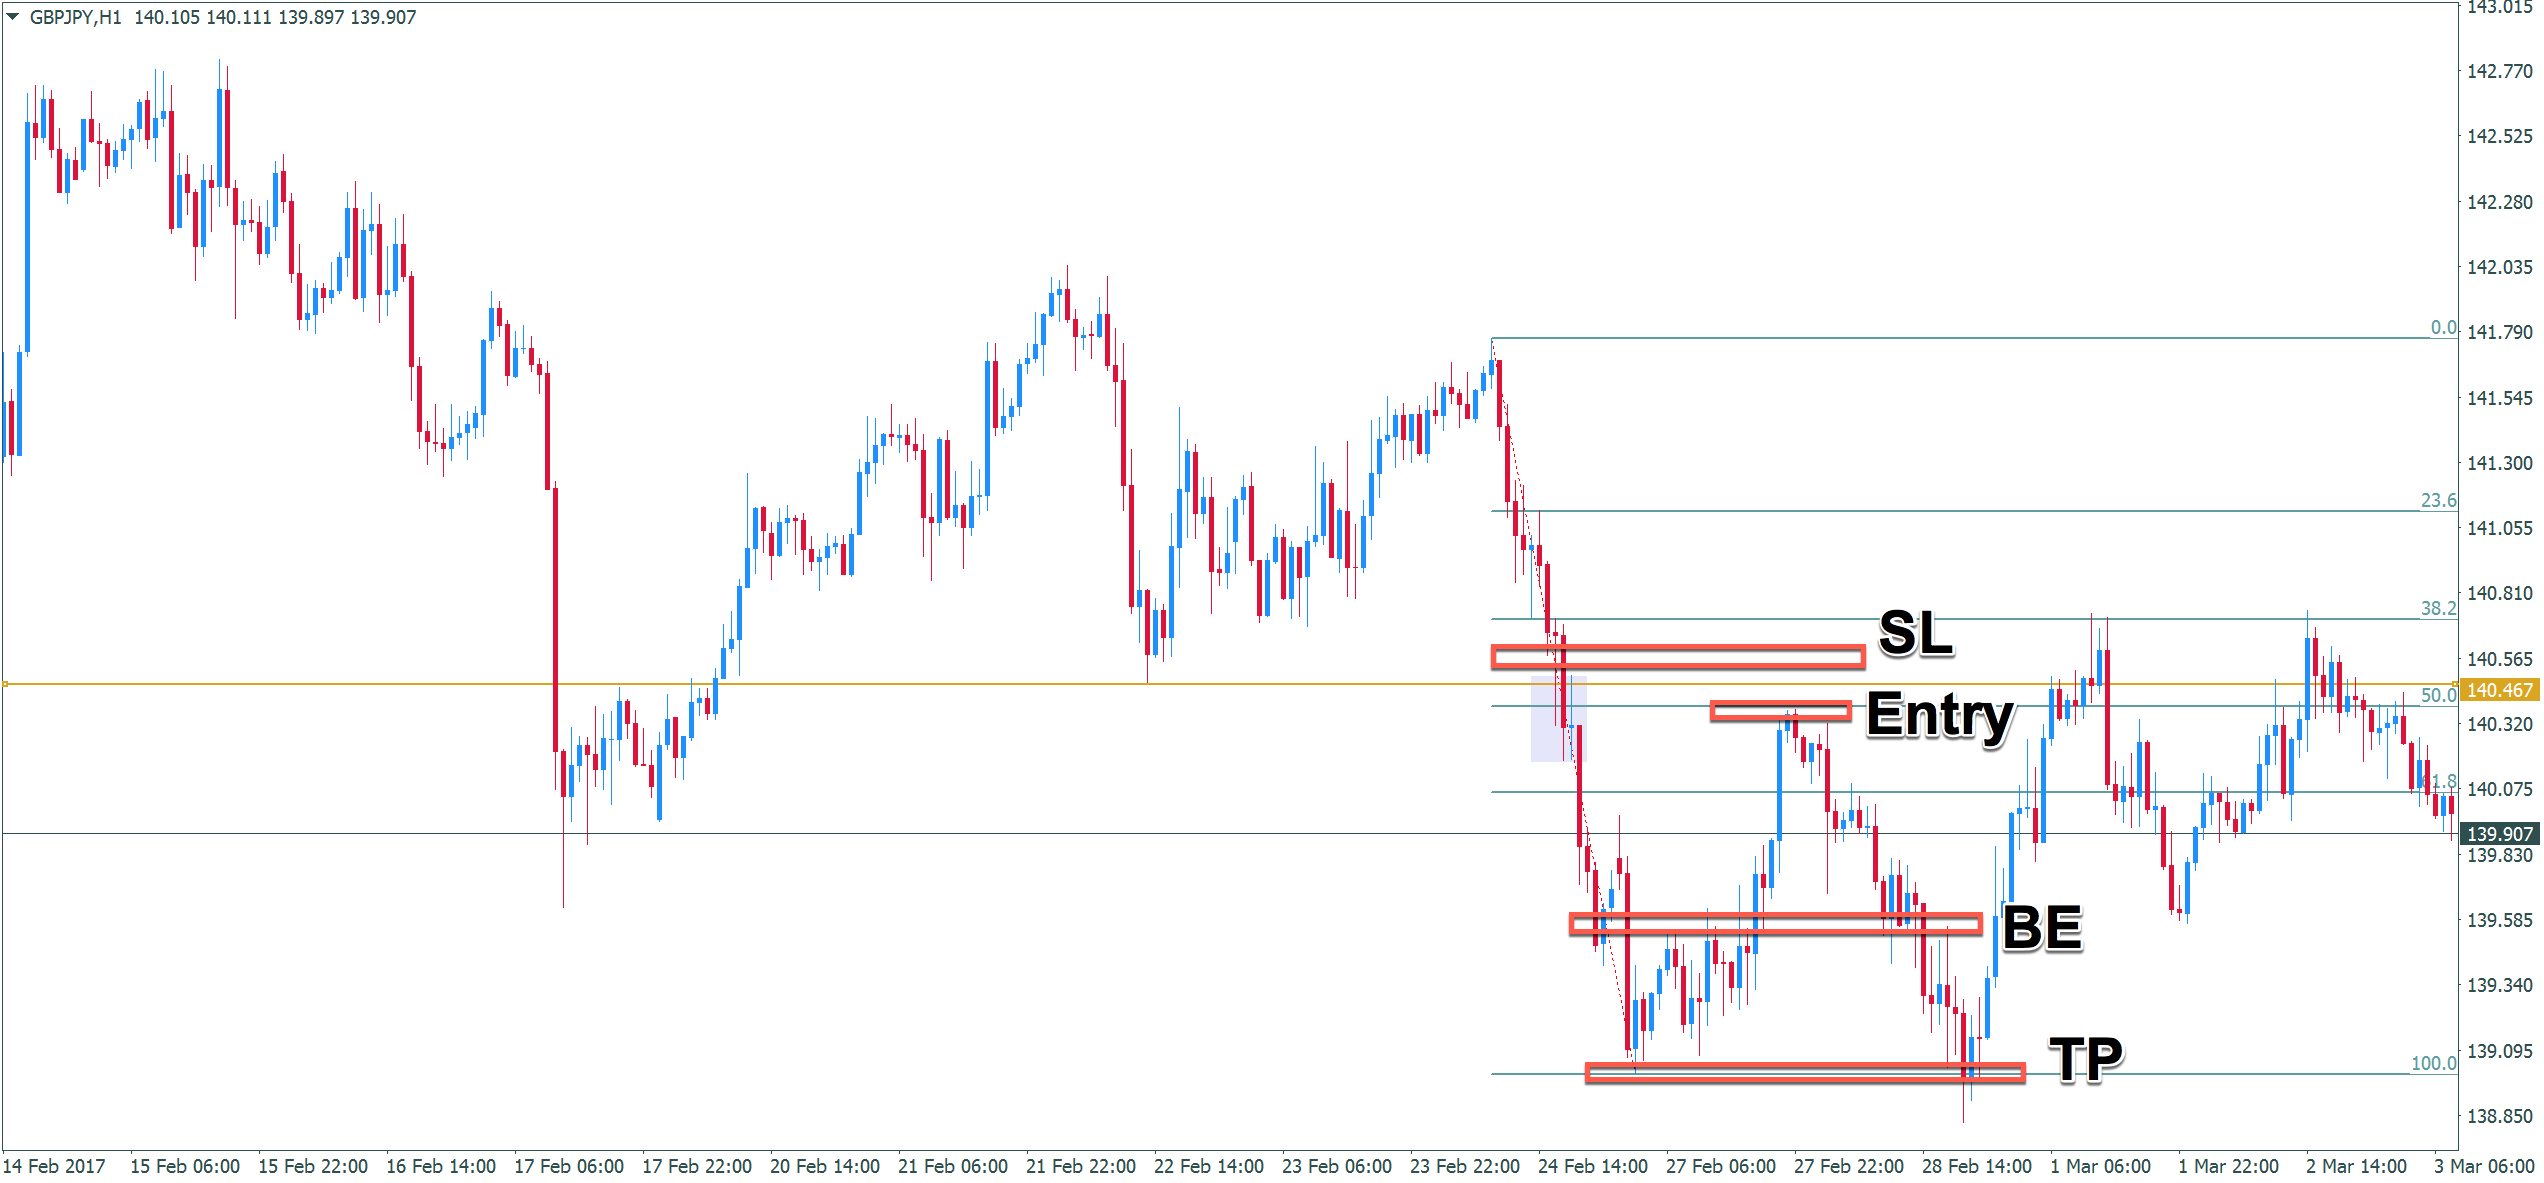
Now we apply our Fibonacci retracement tool to the extreme swing points. We look for the zone between the 38.2% and the 61.8% retracement – this is our “kill zone” where we look to place our pending orders in confluence with our previously identified zones or we can seek for price action confirmation at those areas before entering our trade.
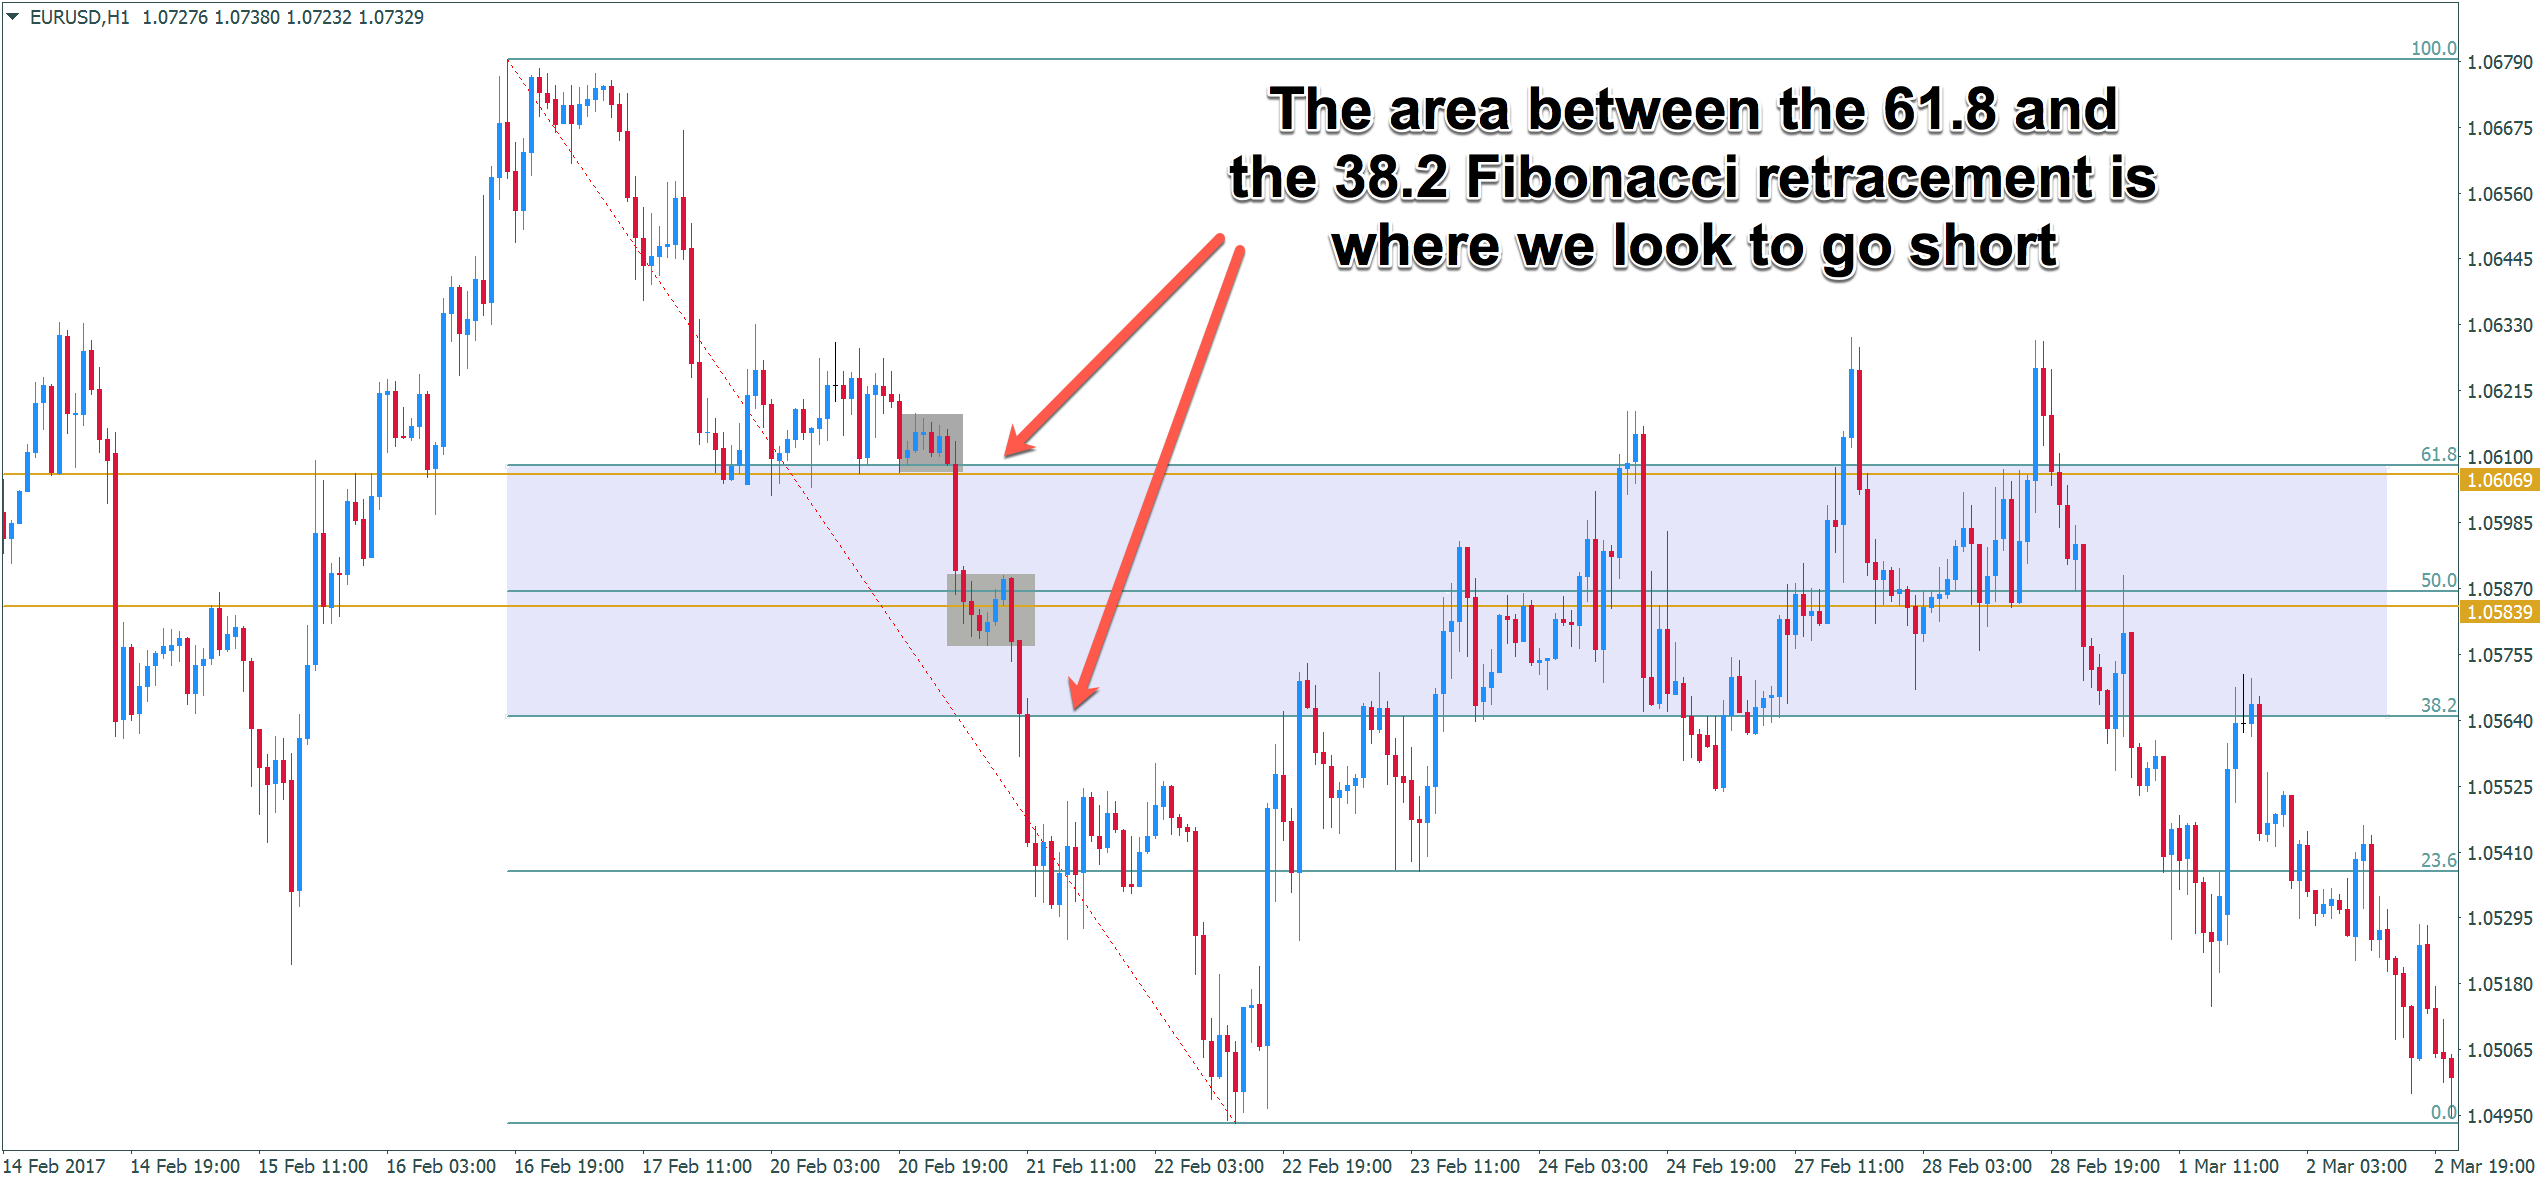
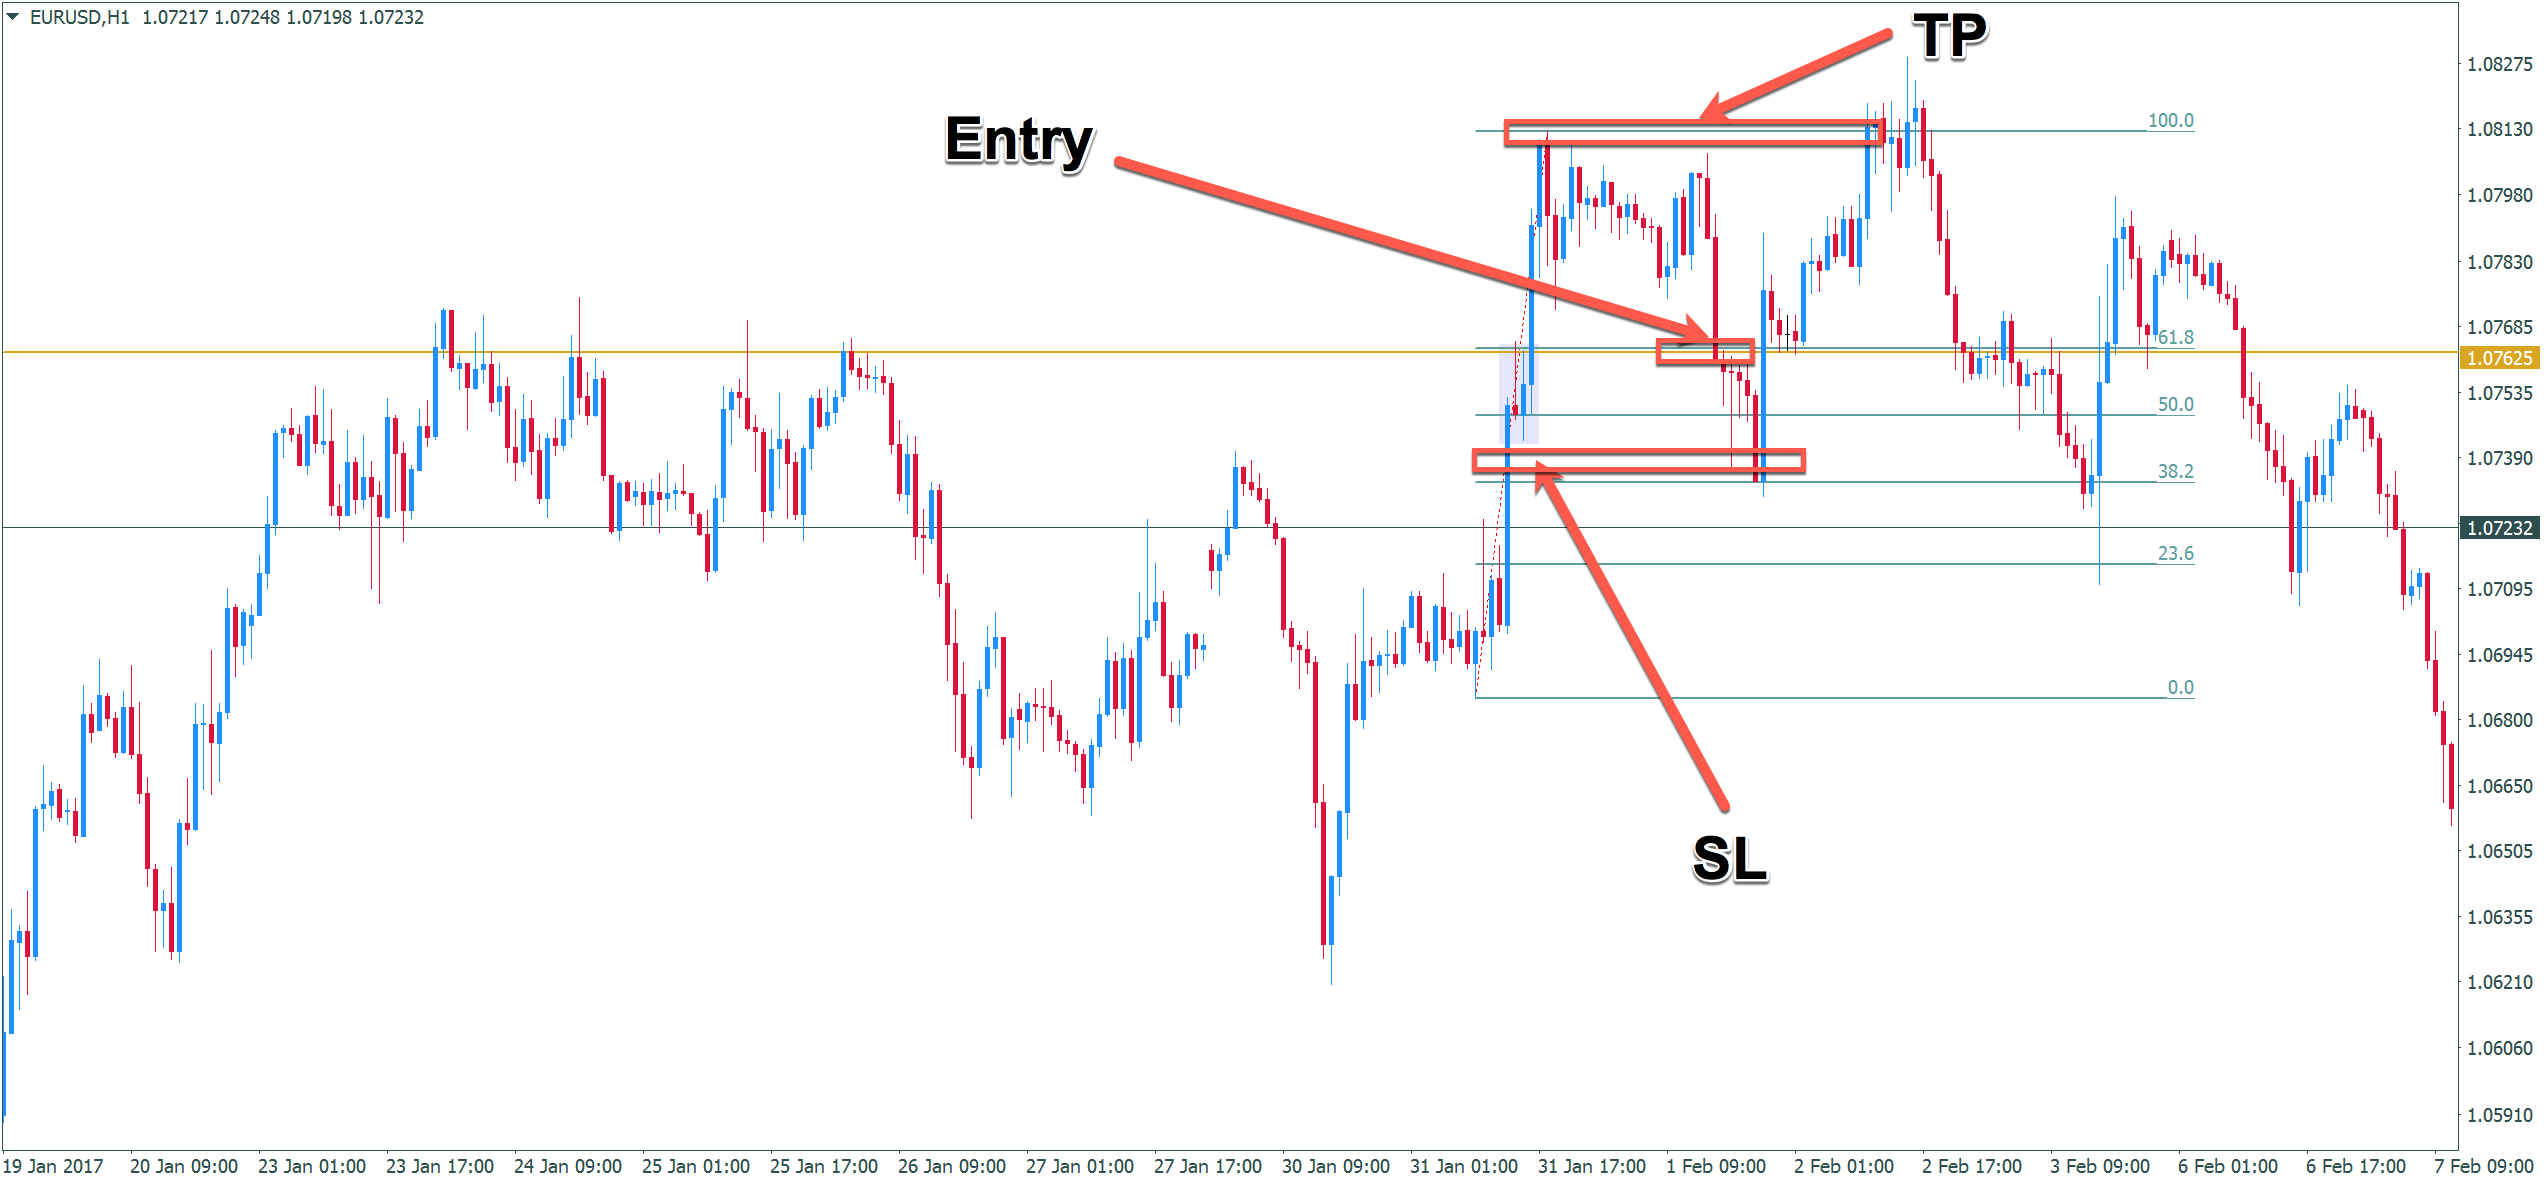
Now we have two options, as I said already – we wait for price to approach our zone and then go short after we spot a bearish Pinbar, Outsidebar or Two-Bar-Reversal, or we set up pending orders at our S/D and S/R zones and try to make a higher RRR, albeit with a lower winrate. It is up to you. When multiple levels are close to each other, we set up multiple orders to get into our trade and split our risk accordingly, if we want to get in with pending orders. The stop loss always goes 5 pips behind the S/D zone or behind the bar that broke the S/R level, if it is a strong, large-ranged bar. How did this play out in the case of our two possible setups? Here is number one.
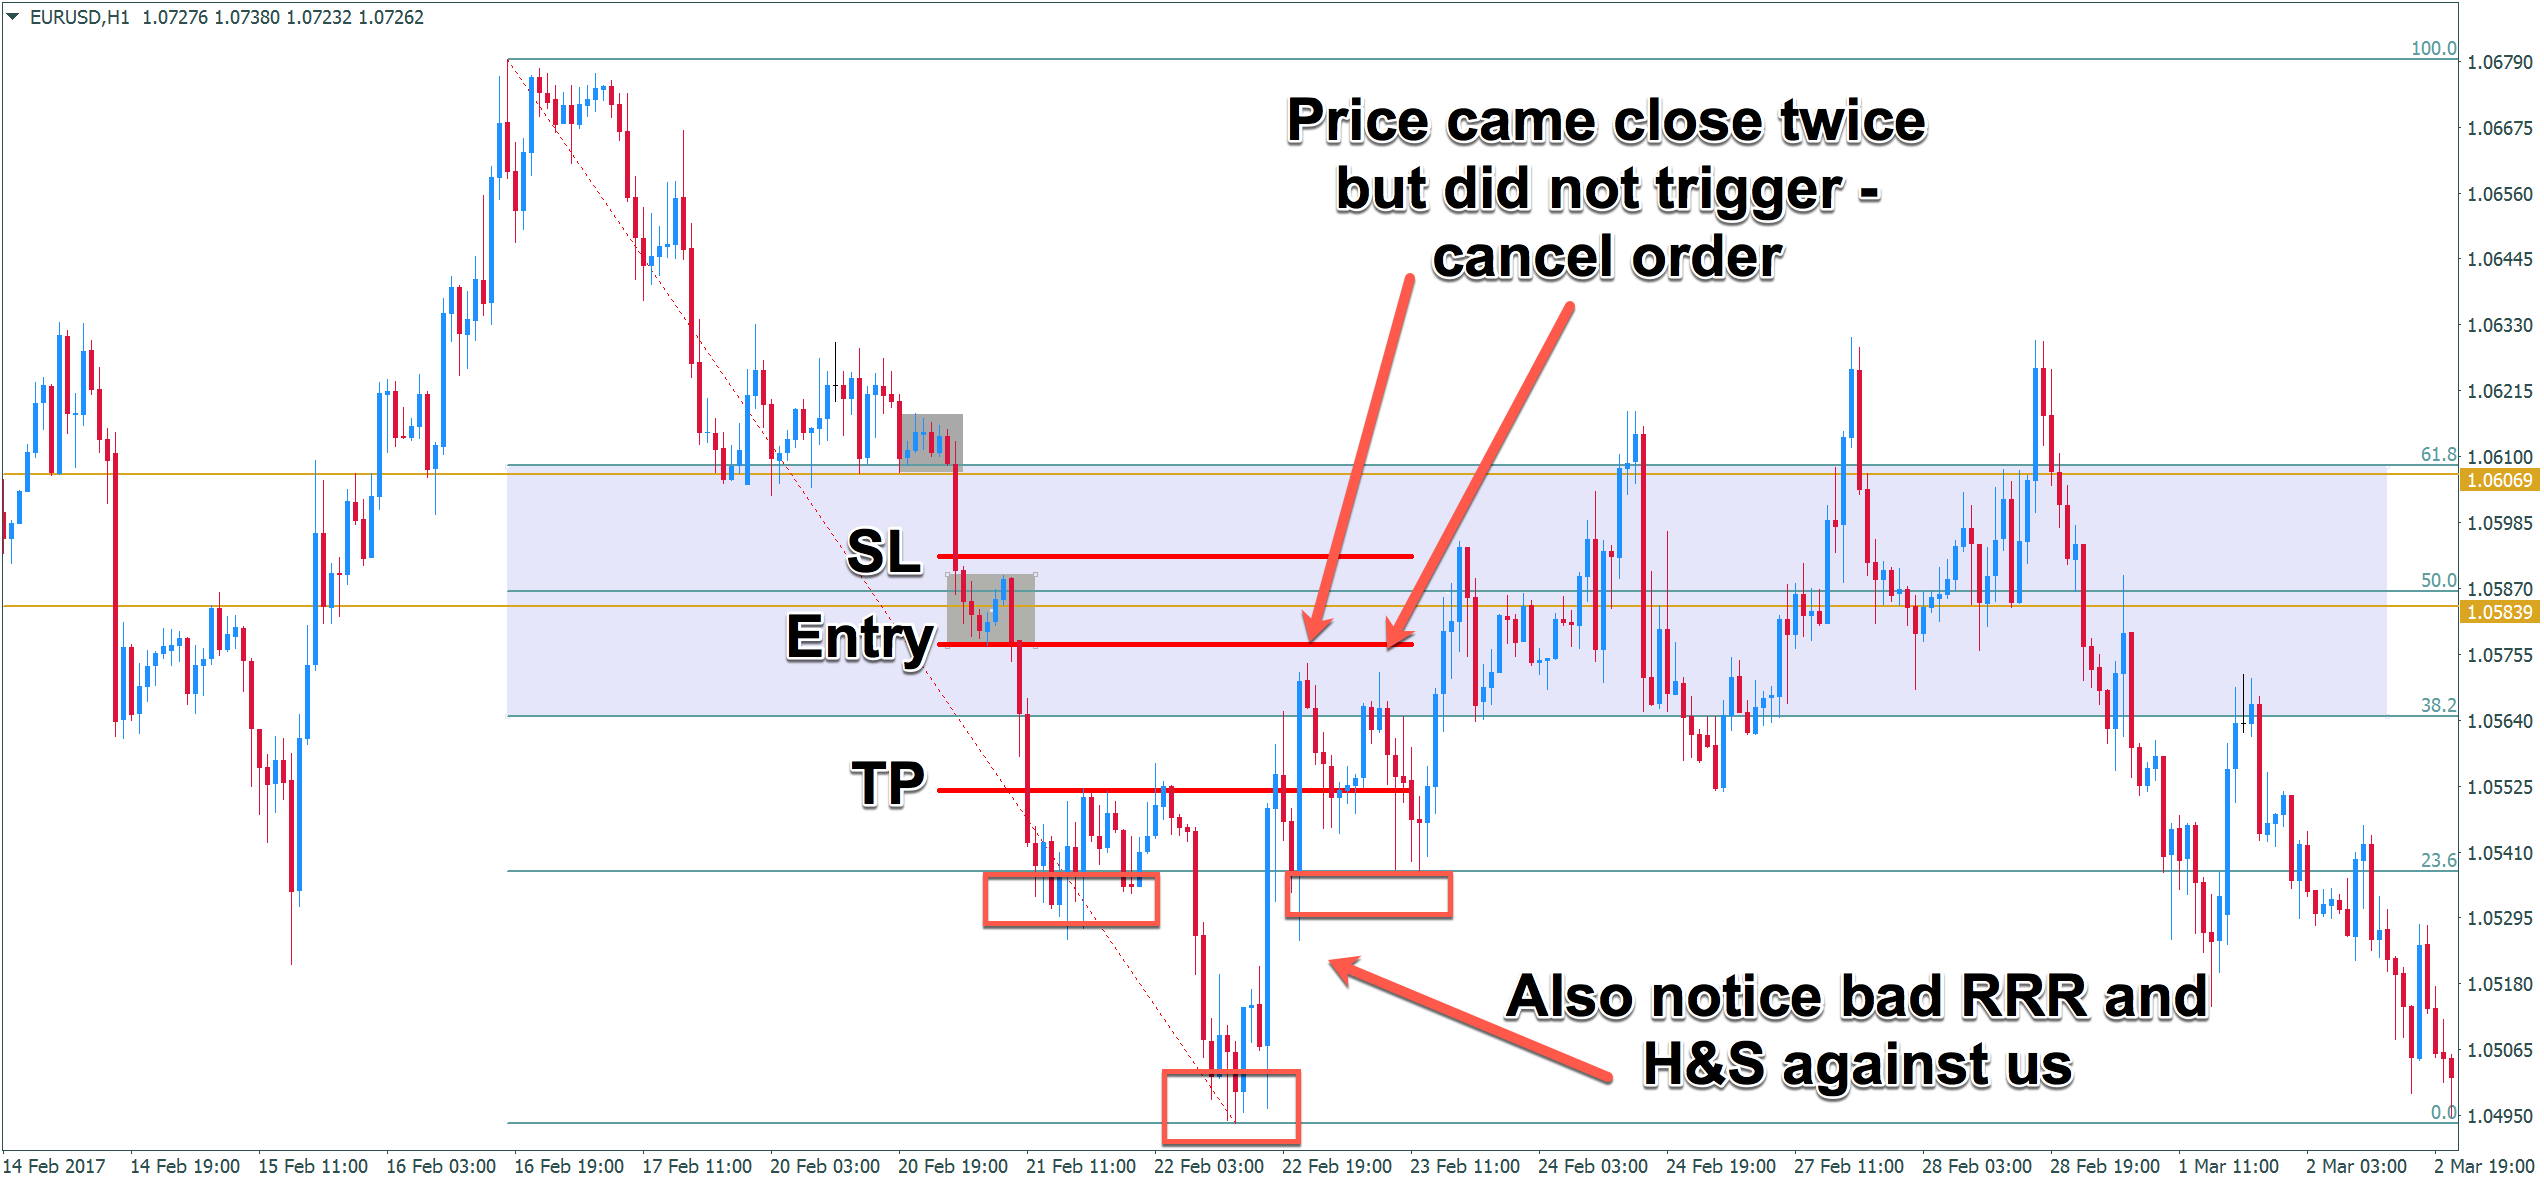
As you can see, price came close to triggering our order twice but took off before doing so. After that happens, I will cancel my order. Additionally, our RRR only would have given us around 1.5:1 and we were trading against a strong bottoming structure – a beatiful, perfect H&S – seeing all of that, I would not have put on my orders in the first place and would have waited for price to reach the higher order block to see what would happen there.
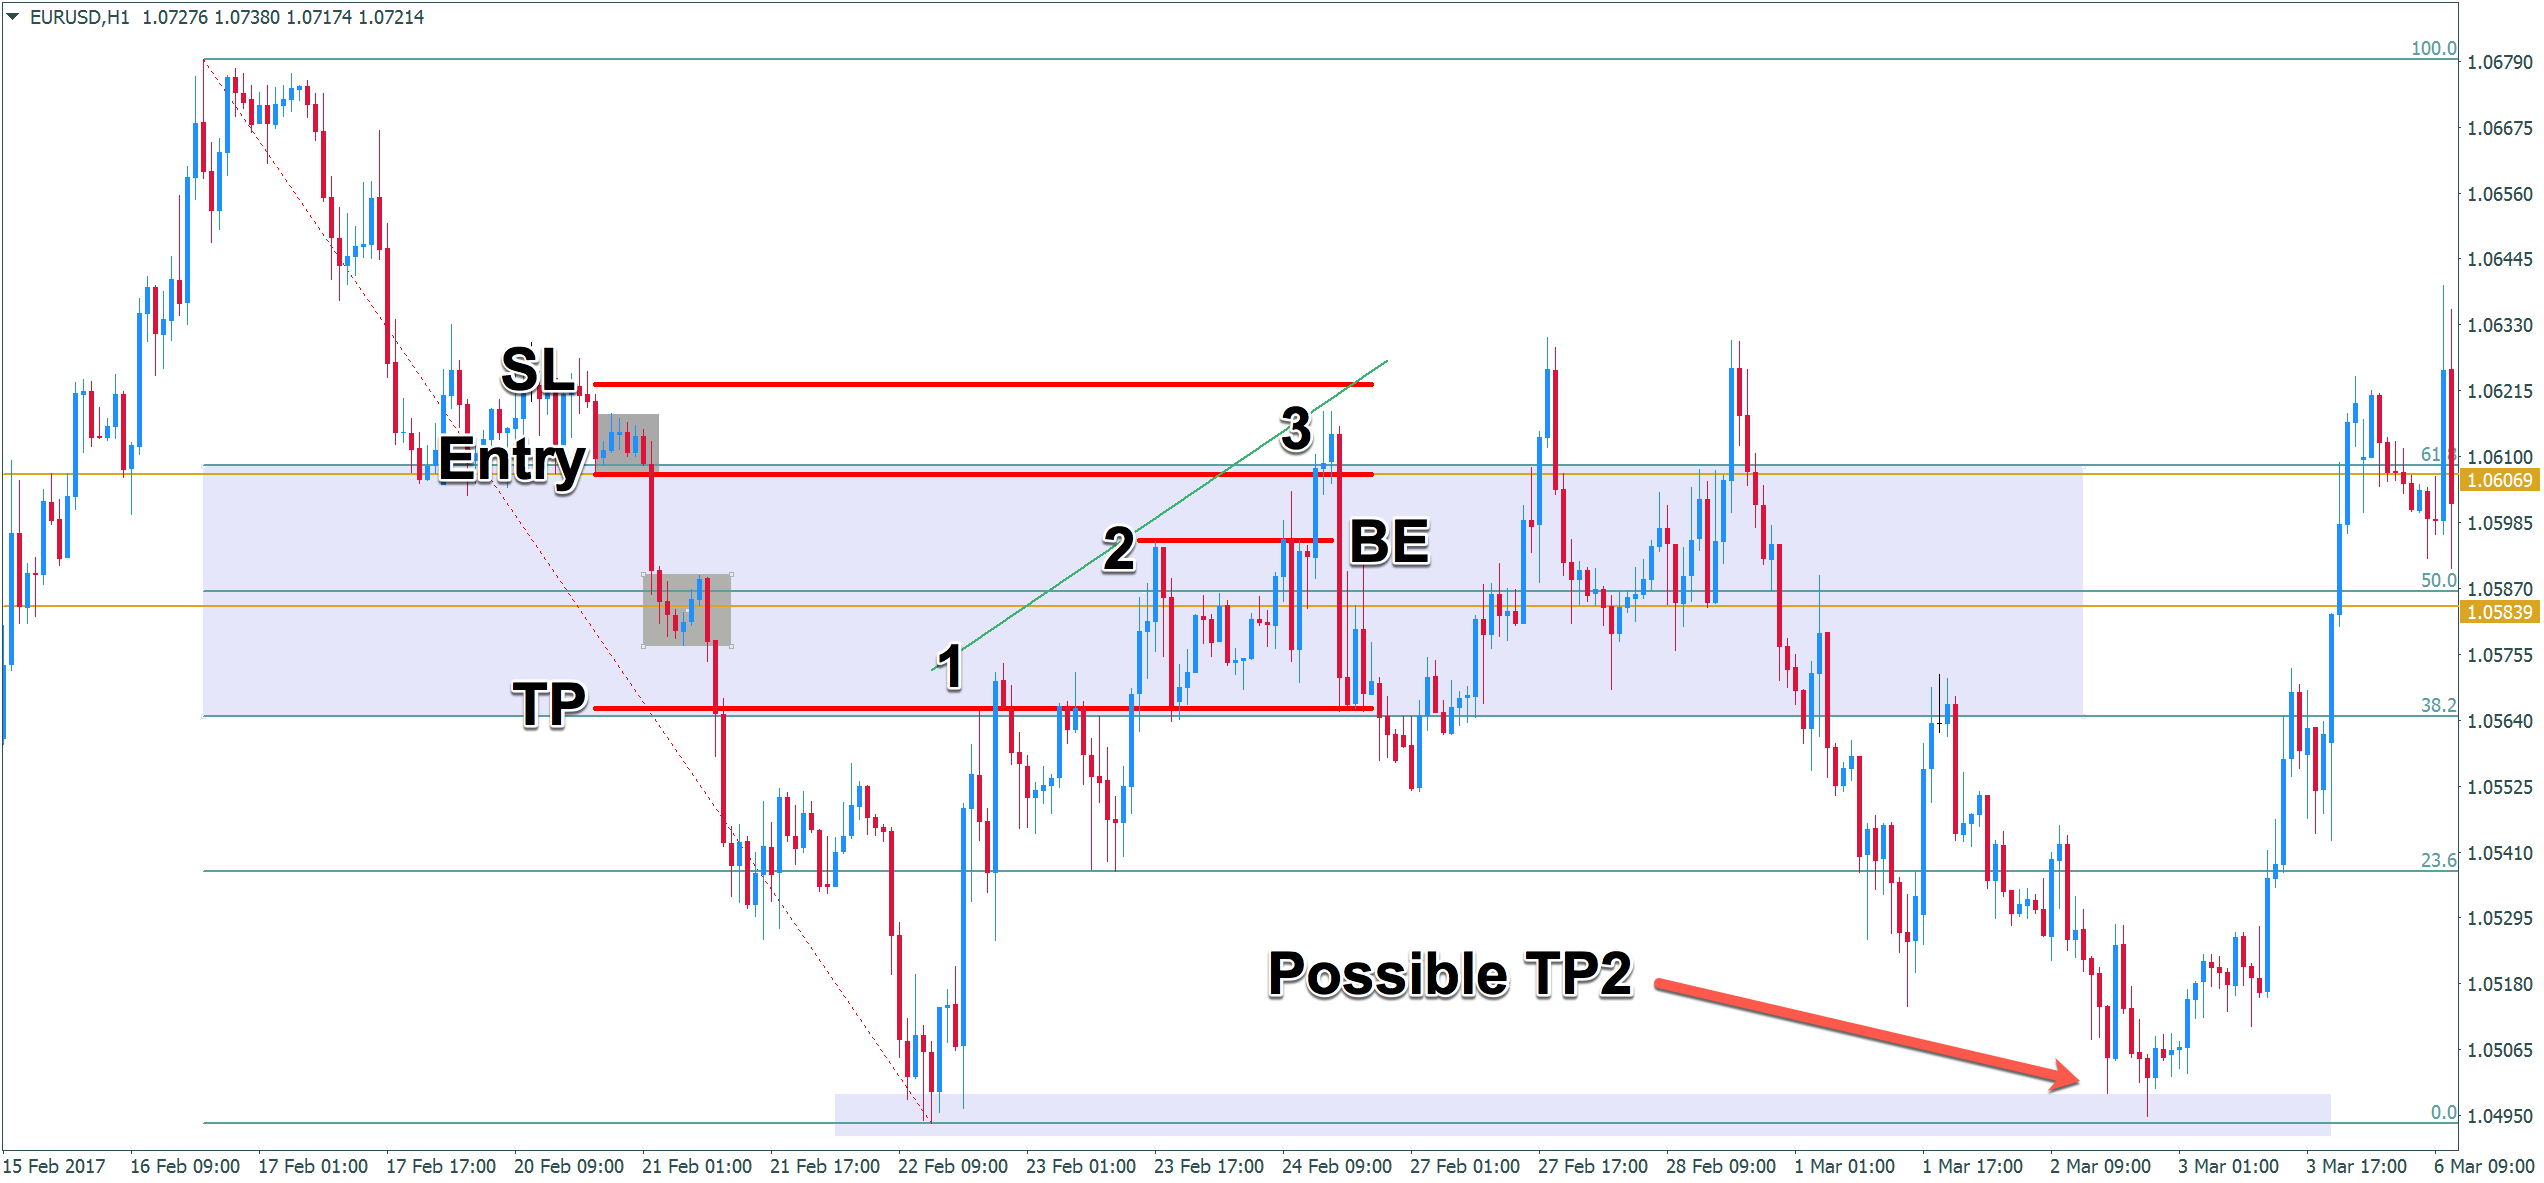
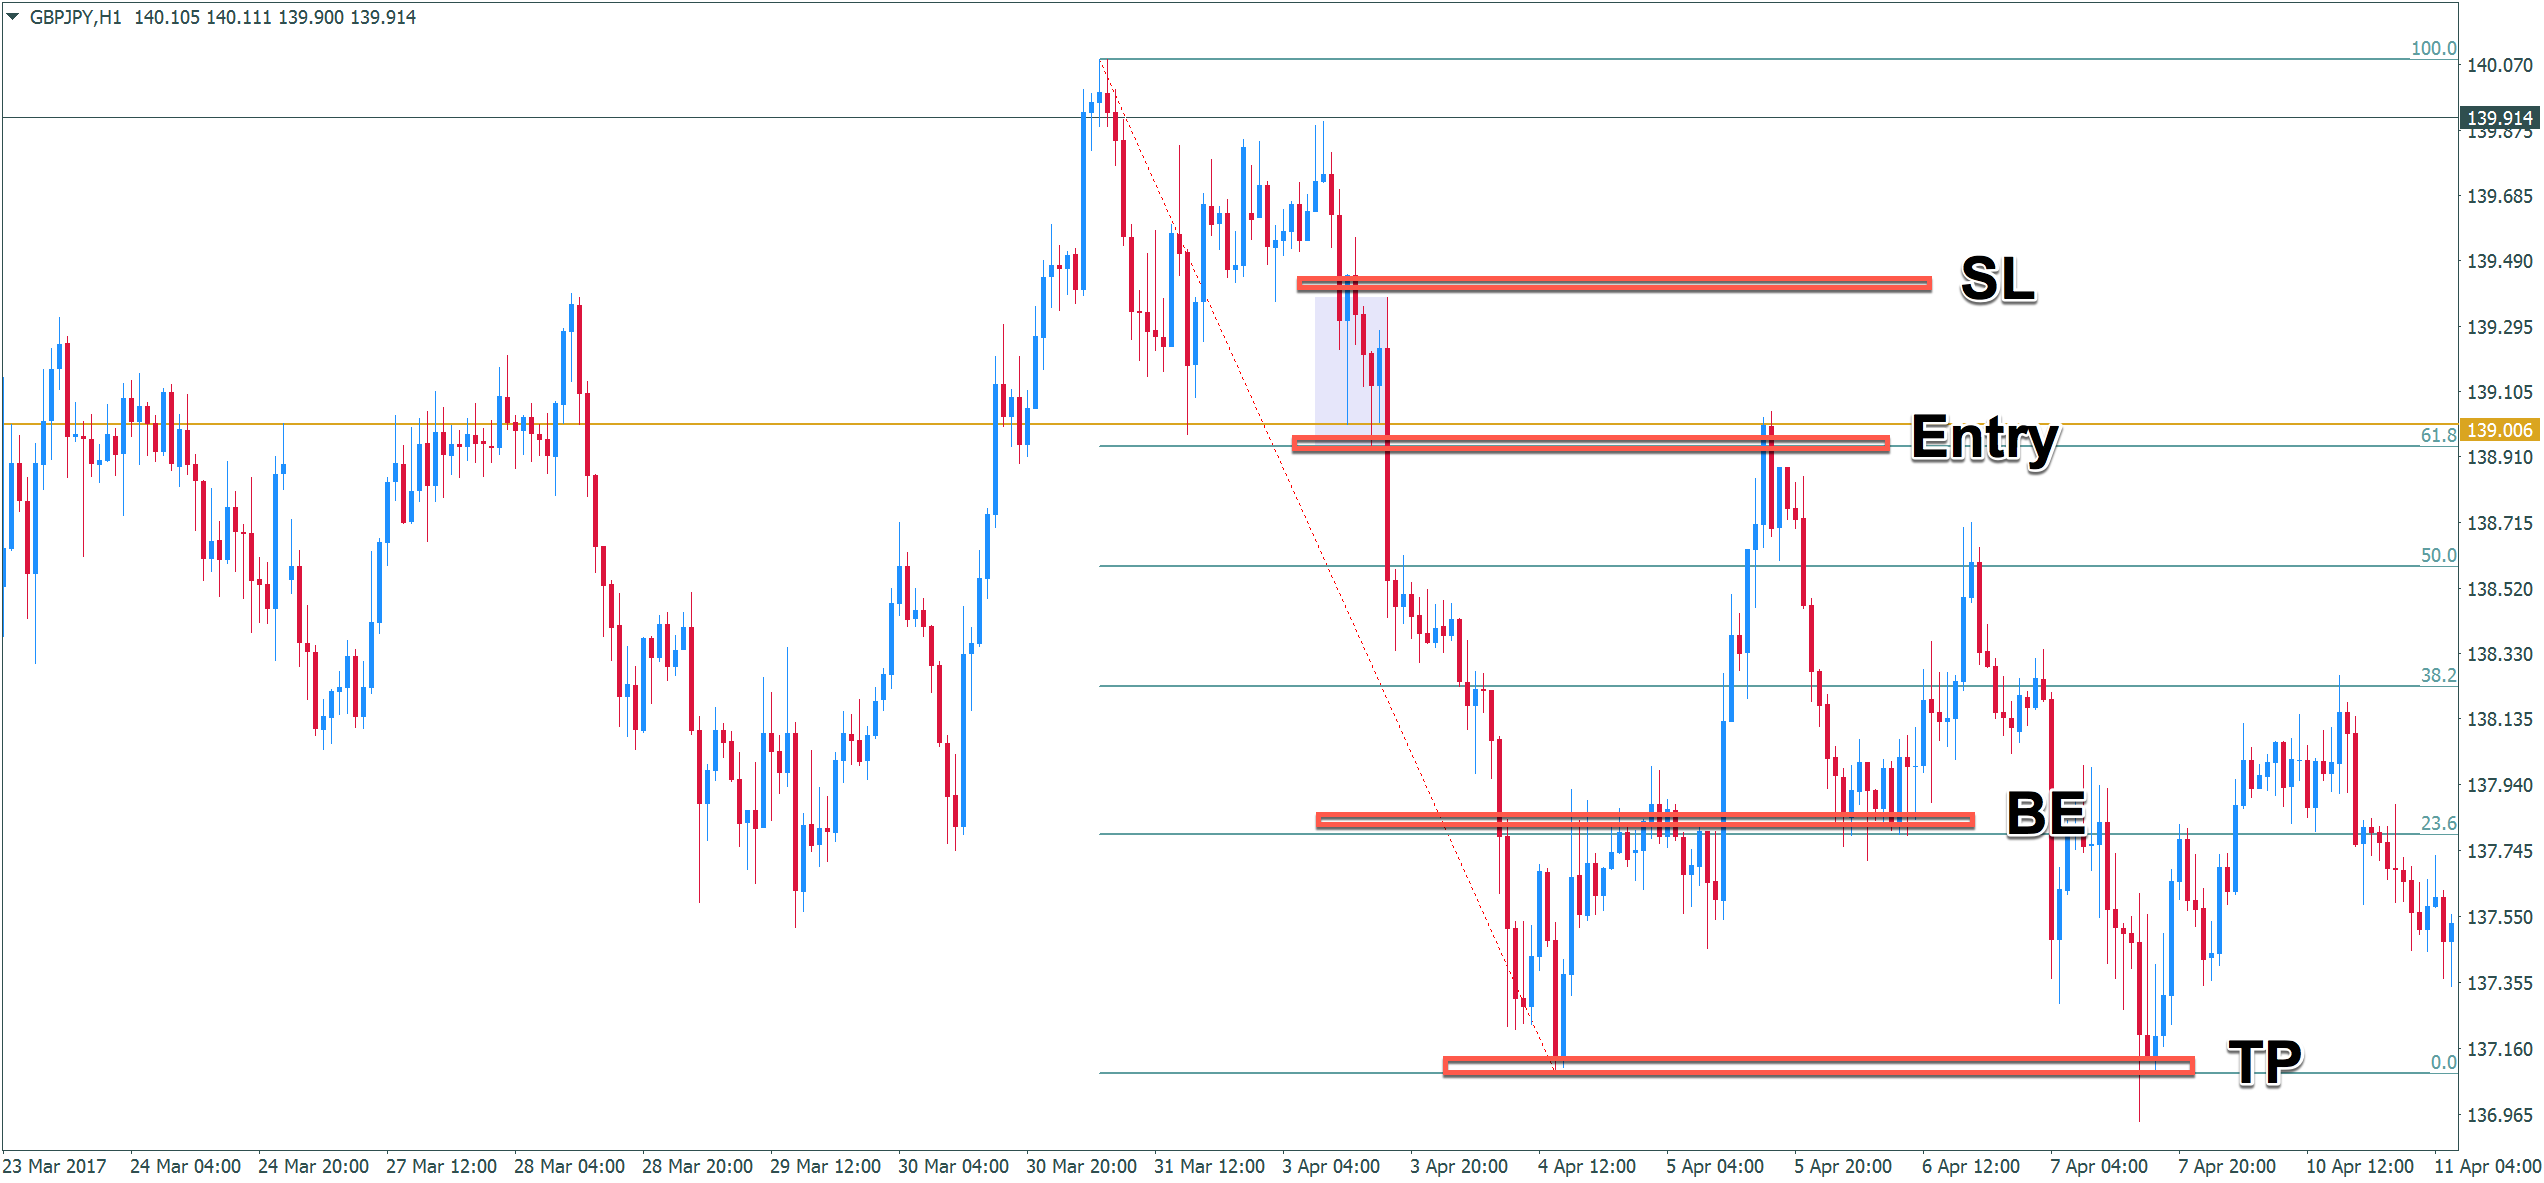
This trade looks much friendlier. We have a defined break even area, we can get a RRR of 3:1 and we had three very symmetrical waves to the top – plus, the objective of the H&S on the bottom has been reached which makes price much more likely to crumble down, which it quickly did after hitting our order. The TP is the next major S/R or S/D. Alternatively, you can always target the origin of the pullback, as we are trading the 50% Fibonacci ratio! In this case, you would have gotten stopped out at BE, but sometimes you can catch huge RRR trades like this. It is up to you, or you can split up your TP’s.
For this trade, no price action confirmation could be found on any of the time frames, so waiting for confirmation would have made you miss this one, which is absolutely ok, as long as you stay within the rules of your system.
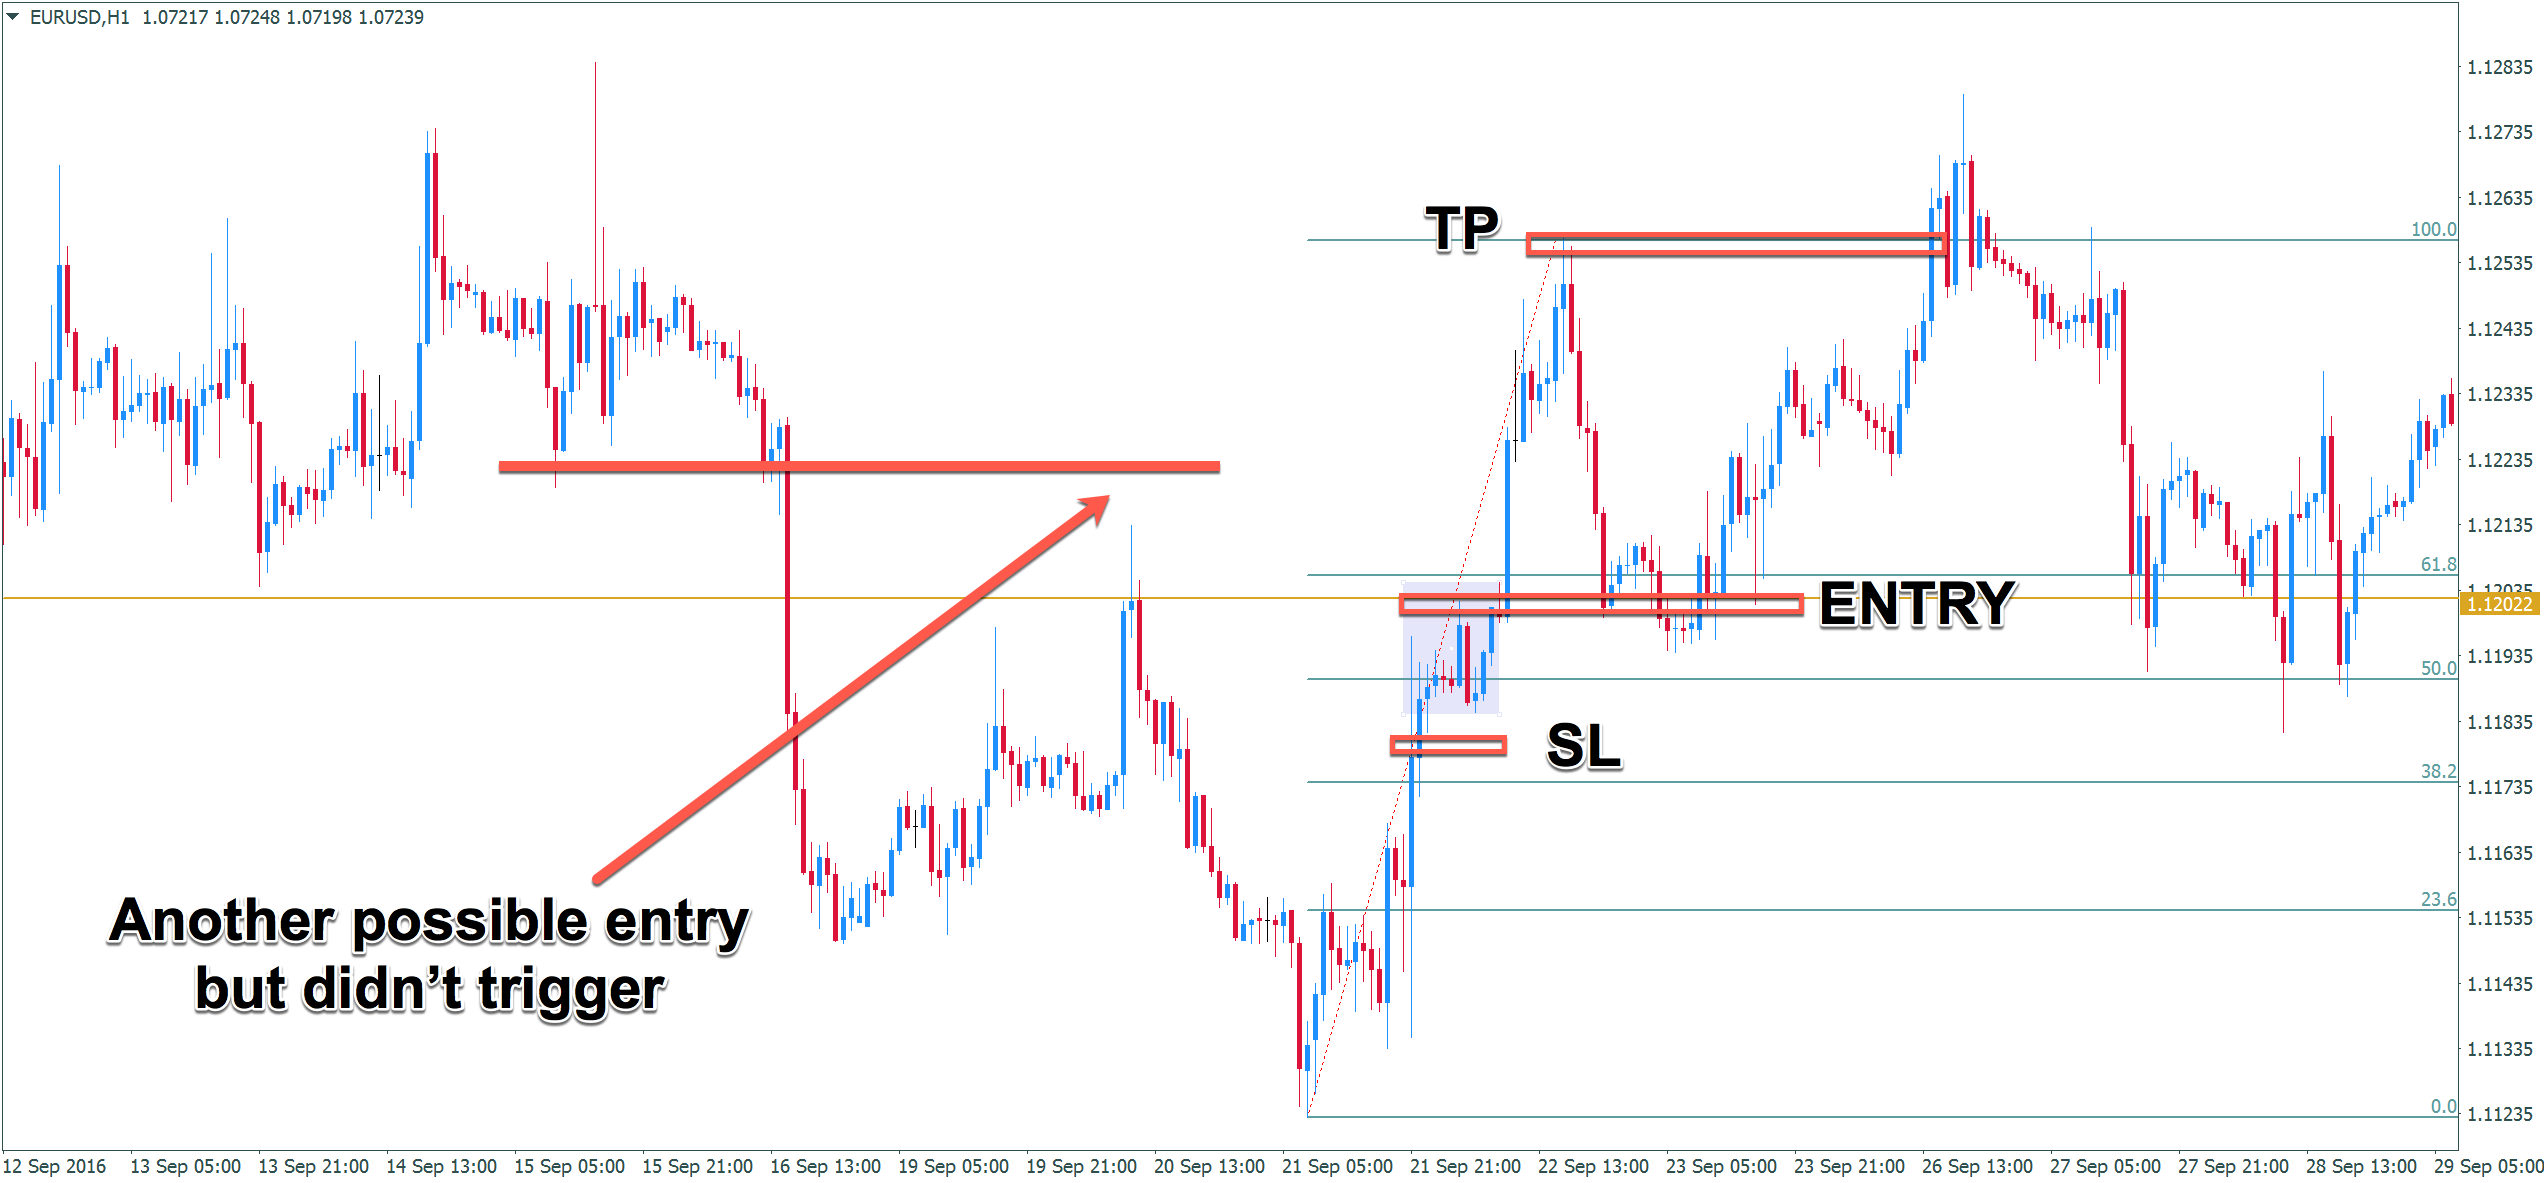
Here are a 5 more examples of S/R, S/D and Fibonacci confluence trades.
Combine this style of trading/levels with price action bars and you have an invincible strategy. If you can wait for 1-2 setups per week and actually have the patience for price to come to you, this setup will serve you well.
external link:

We have been trading supply and demand strategies for over ten years, and they have stood the test of time remarkably well. Supply and demand is...

3 min read
Choosing the right trading journal is essential for traders wanting to analyze performance, refine strategies, and improve consistency. In this...
3 min read
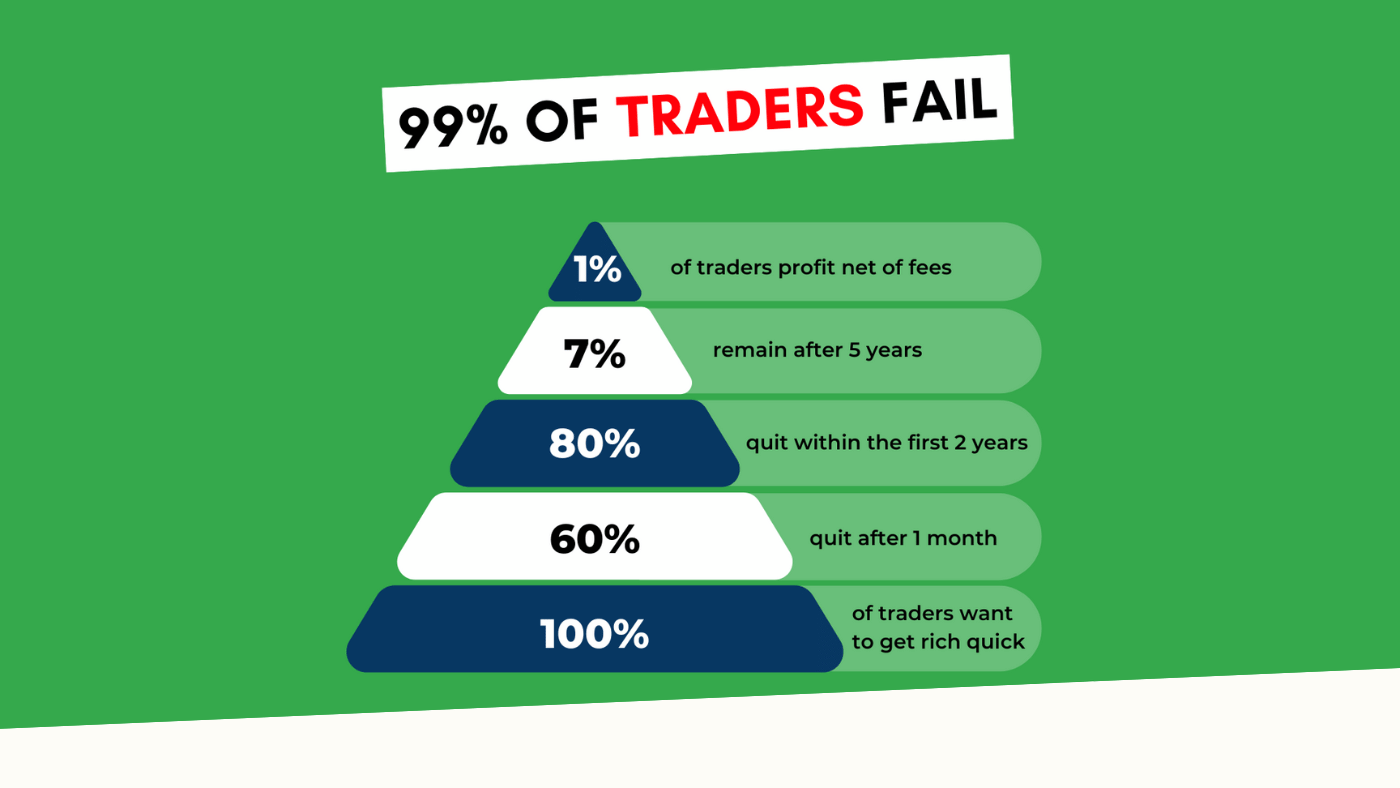
“95% of all traders fail” is the most commonly used trading related statistic around the internet. But no research paper exists that proves this...