3 min read
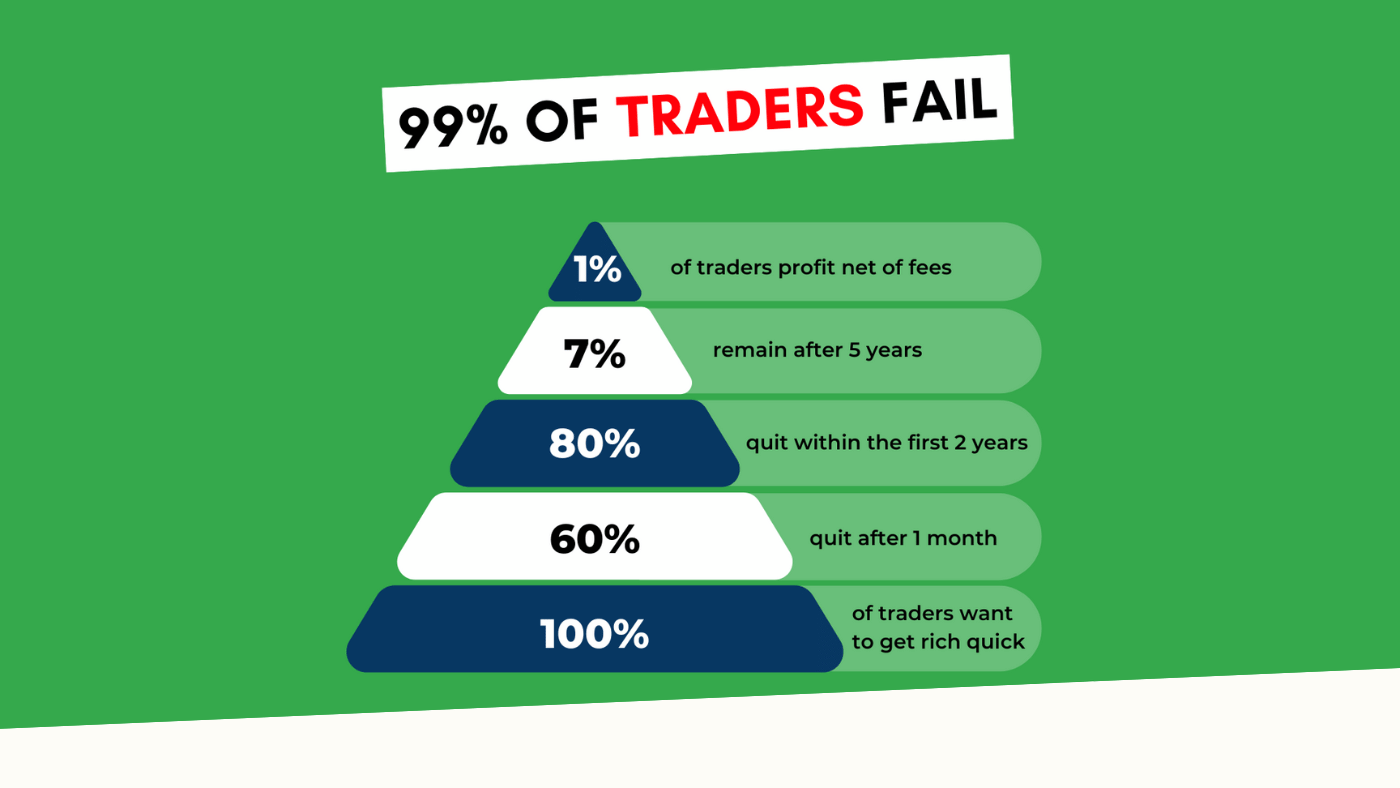
Scientist Discovered Why Most Traders Lose Money – 24 Surprising Statistics
“95% of all traders fail” is the most commonly used trading related statistic around the internet. But no research paper exists that proves this...
We would all agree trading can essentially be broken down into three distinct actions; entering a trade, managing it, and the exit.
Assuming you have a winning trading system that frequently allows you to pick high quality trades, you probably already have the entry part covered. It is a known fact that most traders will burn their accounts off potentially messing up in the other two departments – namely managing a trade live and making a timely exit so profits can be maximized and losses, minimized.
Below I list down four steps of trade management broken down to their basics, to help you get through your trades via logical action steps that keep emotions (including stress!) at bay.
Too often, traders can get caught up in a myopic view of the markets where they are essentially missing the forest for the trees. This is especially evident when traders are looking for specific bar and / or chart patterns as part of their trading system.
Using higher time frame analysis to locate longer term important support and resistance areas, looking at external factors like divergence, and generating a broader feel of the market (trending versus range bound versus choppy markets) comes well before even executing the trade.
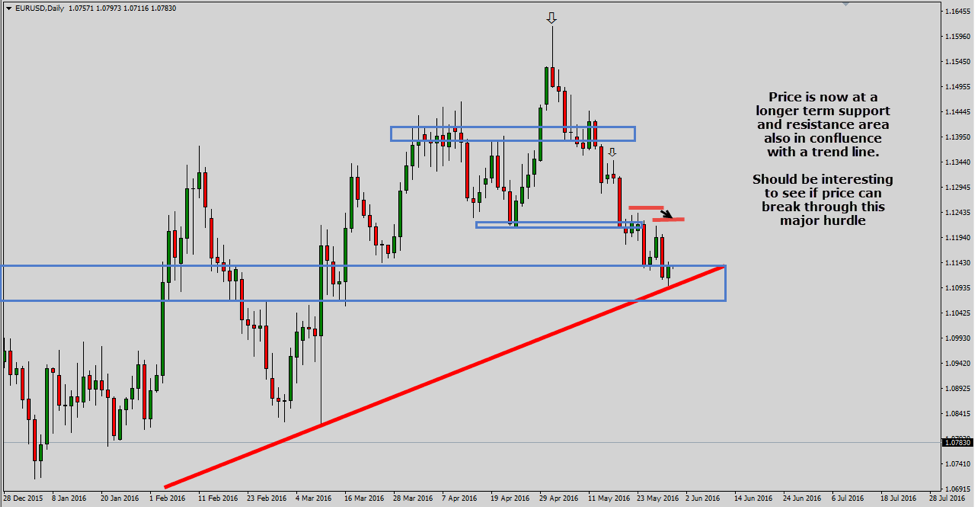
Let’s take at an example setup where we can identify a textbook bearish pin bar trade using price action and support and resistance cues. As we go through each of the five aspects I will explain how they directly apply to our example.
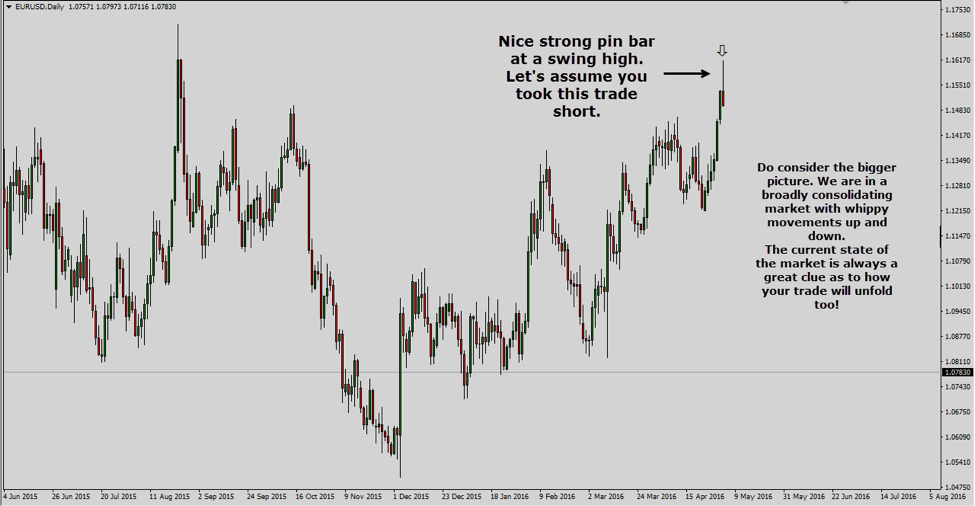
We are seeing a good bearish setup albeit in a market that is mostly sideways with some whippy action occasionally. Expecting a different treatment from the market would be naïve.
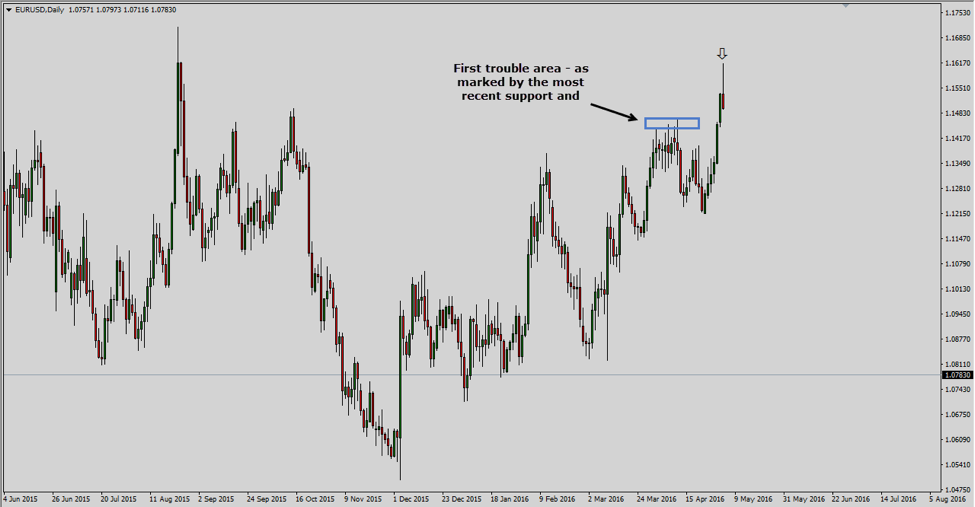
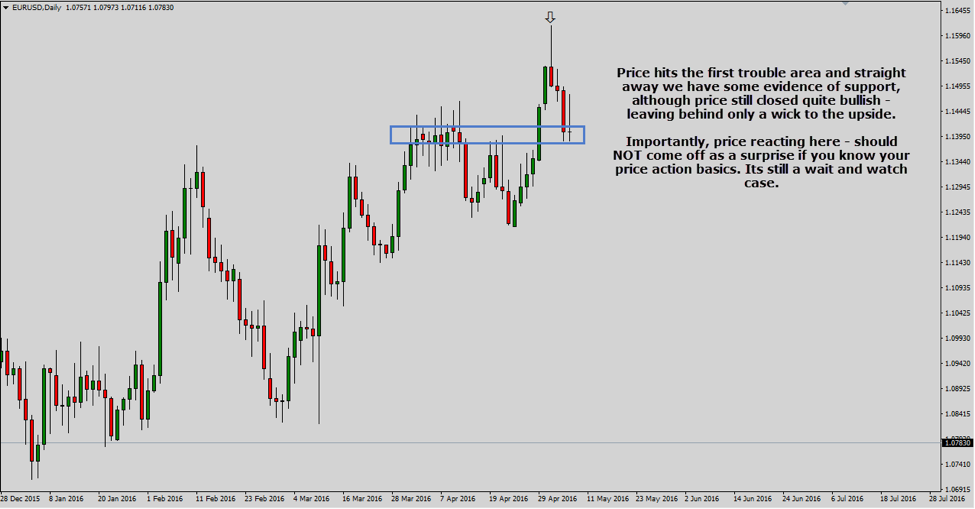
Now we start with mapping out areas on the chart we believe could be potential trouble areas for price. In that context, the ‘first trouble area’ is perhaps the most important piece of information you can use in managing a trade successfully.
This is defined as the first area in the pathway of price where it could possibly react and cause a rebound. The first trouble area can sometimes literally just be a prior bar high or a set of prior bar highs. It does not necessarily have to be a major support and resistance zone.
As a trader your first expectation from the trade is to see price hitting this area – and if all goes well – pierce this area for more profits.
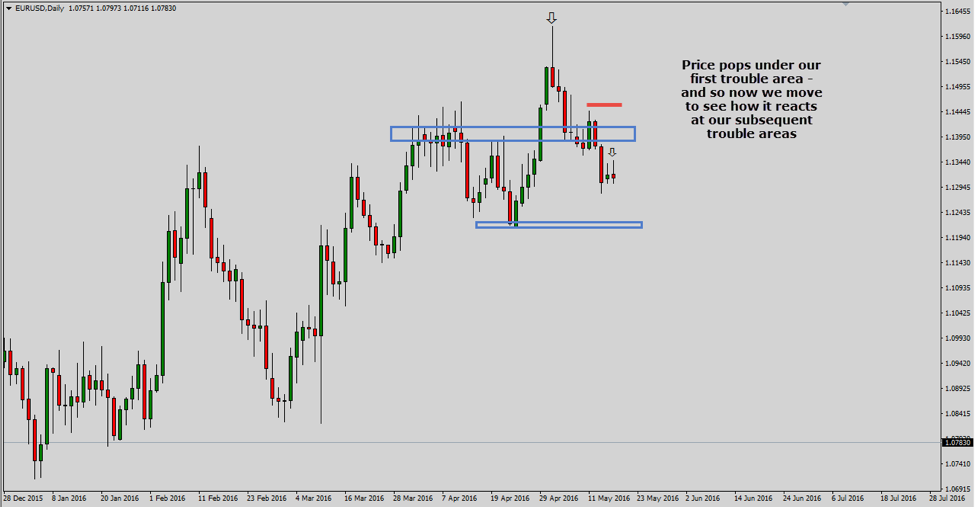
Generally, the first trouble area will mark for a good place to take some profit of the table (close part of the position). Depending on how close the first trouble area is to your entry point, moving the stop loss from the initial position (at the time of the entry) could also be an option, provided you do not suffocate the trade. (Note: We are in a sideways and choppy market and we do need to account for minor whips in either direction).
Your next set of actions needs to be focused on nailing down subsequent areas of former support and resistance that could again hinder price movement. It is a good idea to be marking these out in advance so you have the entire action plan laid out. One of the best feelings from trading is the authority to not be surprised by what price does!
Let’s get back to our example and see how we can mark these areas out:
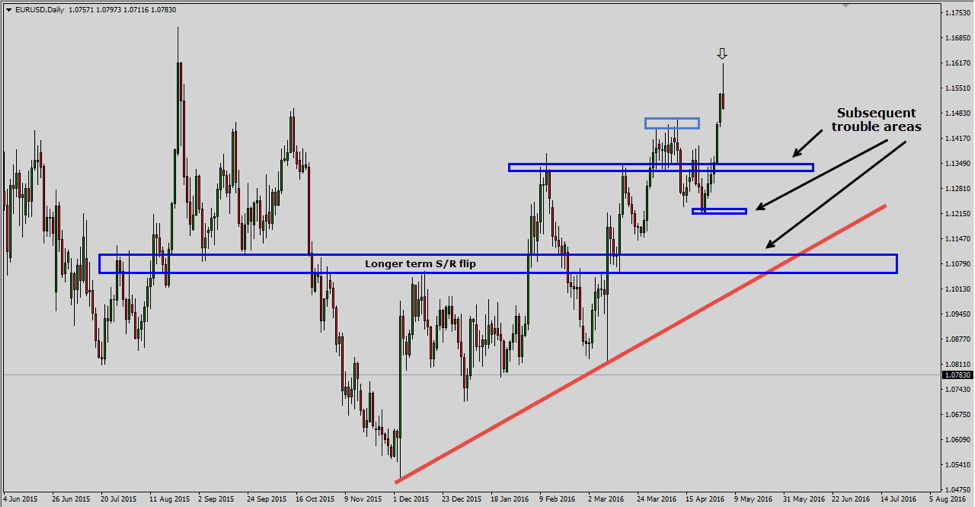
It is important to not only look at horizontal levels but also other indications possibly from moving averages, or trend lines as shown above. You can see how one of the areas shows off a “confluence” of a longer term support and resistance flip on top of a rising trend line. These are the areas we want to really watch out for!
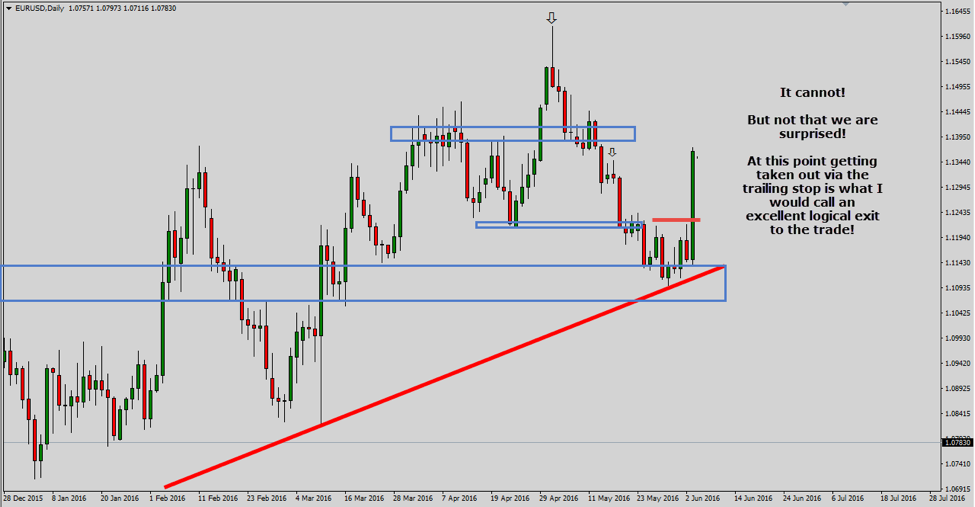
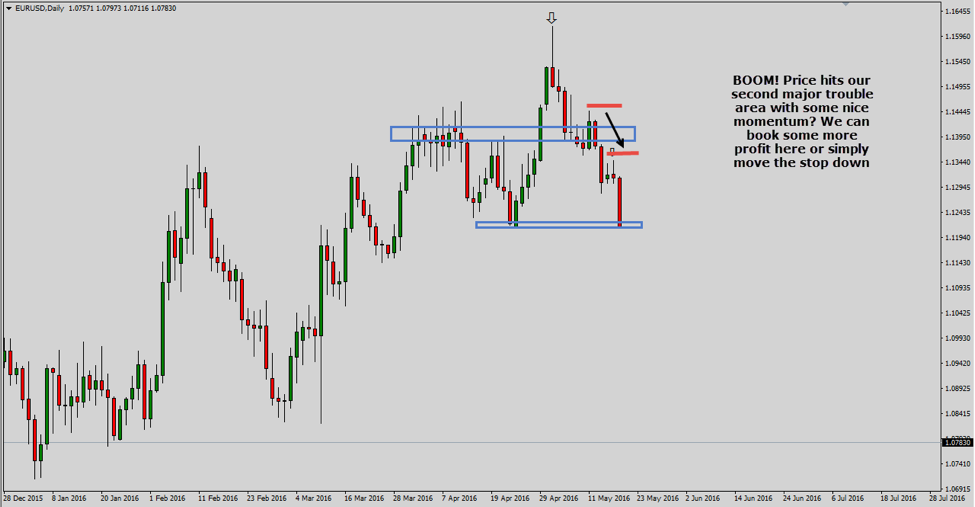
Now let’s jump straight into the real deal – more specifically, managing stops. The idea is to book profits / move your stop enough to cover for adverse market reactions but at the same time give the trade enough room to breathe (again keep in mind the broader sideways action. A stop too tight could be very vulnerable).
Let’s see how we can approach this logically:
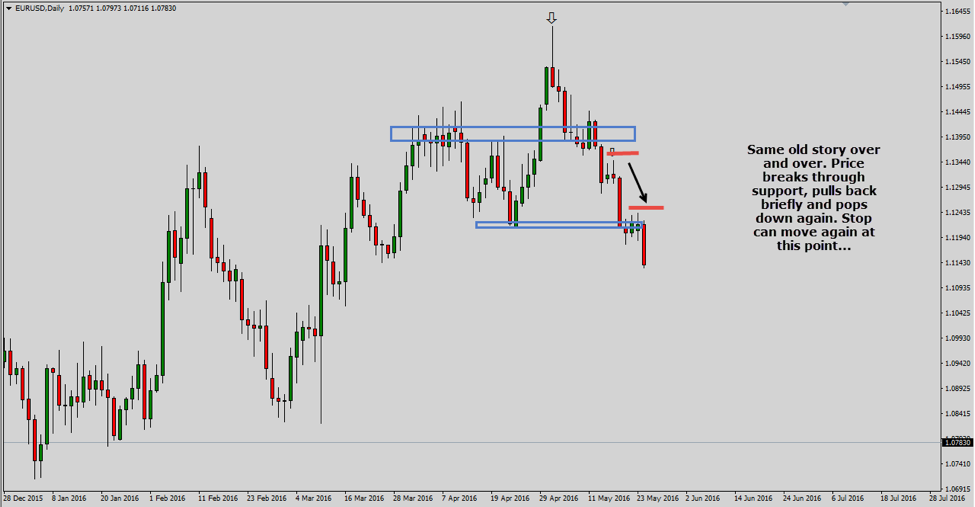

What you see above is a step-by-step illustration of how price tends to react at different trouble areas and how, as a trader, can we use that information to not only manage a trade successfully but also bank our decisions on sound logic to erase all the guesswork and hence keep emotions at bay.
Bear in mind, that this is obviously not the only way to successfully manage a trade. Depending on your risk appetite, you could have a tighter trade management policy (taking full profit at the first trouble area or any other subsequent trouble area) or you could choose to allow the trade to keep going until it hits a trailing stop loss as in the case above.
While the dynamics to managing a trade could differ from system to system, trader to trader and perhaps even from trade to trade, the underlying dynamics still remain the same.
Price will react at support and resistance levels and other indicators that are widely watched. It is really up to us as traders to make the most of the available information to not only execute the right entries but also nail the exits.


external link:

3 min read
“95% of all traders fail” is the most commonly used trading related statistic around the internet. But no research paper exists that proves this...
3 min read
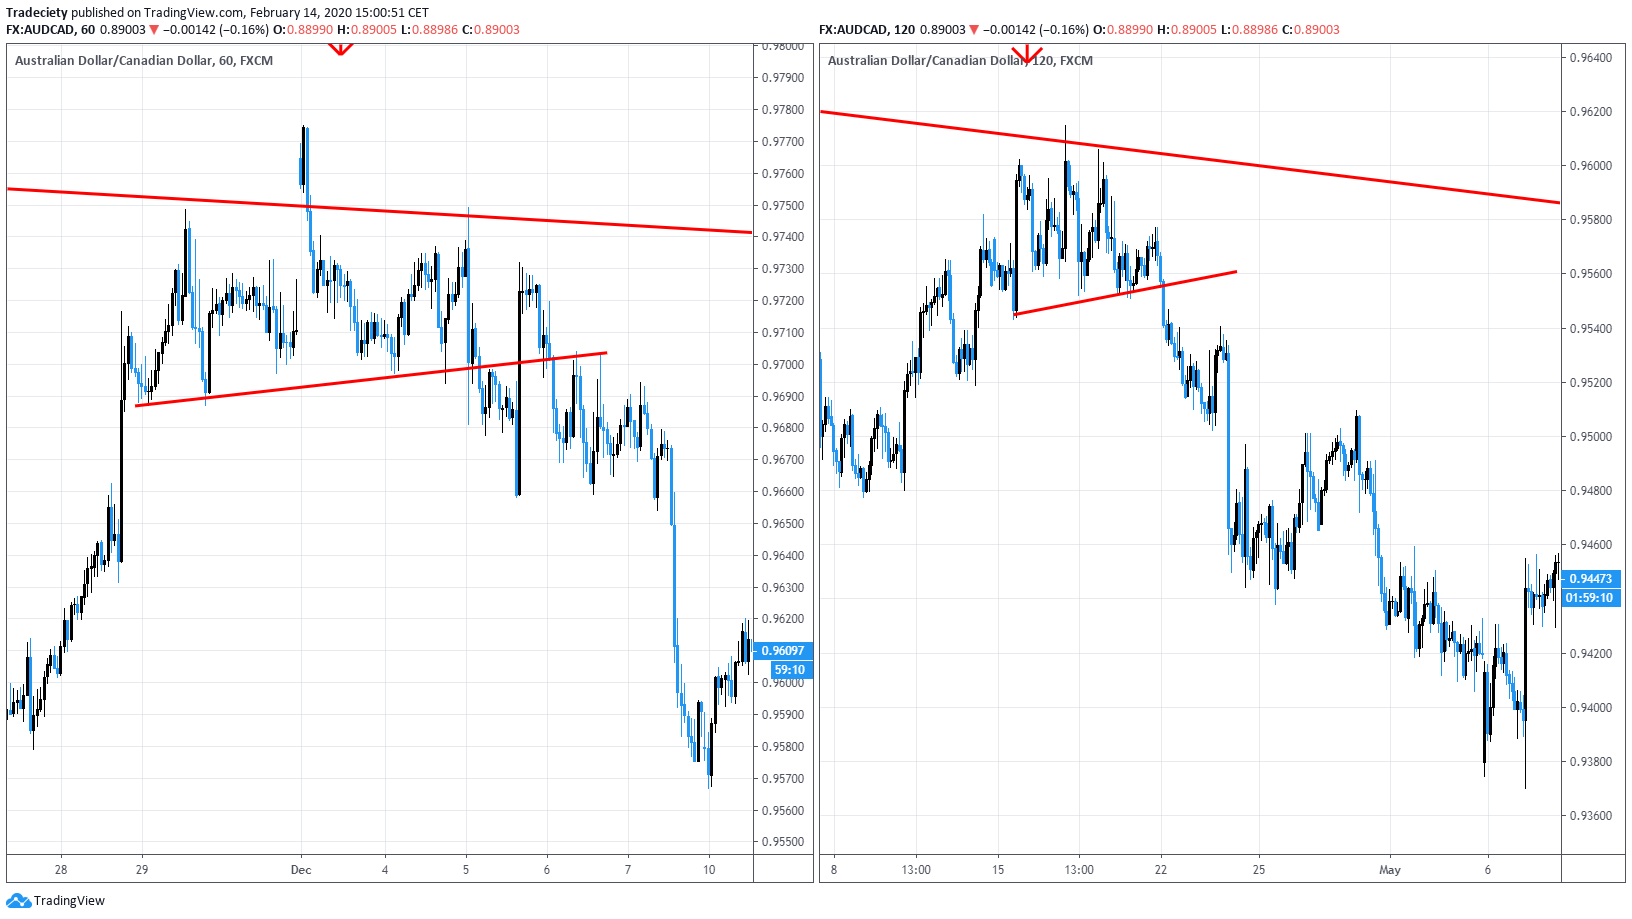
Trendlines can be great trading tools if used correctly and in this post, I am going to share three powerful trendline strategies with you.
3 min read
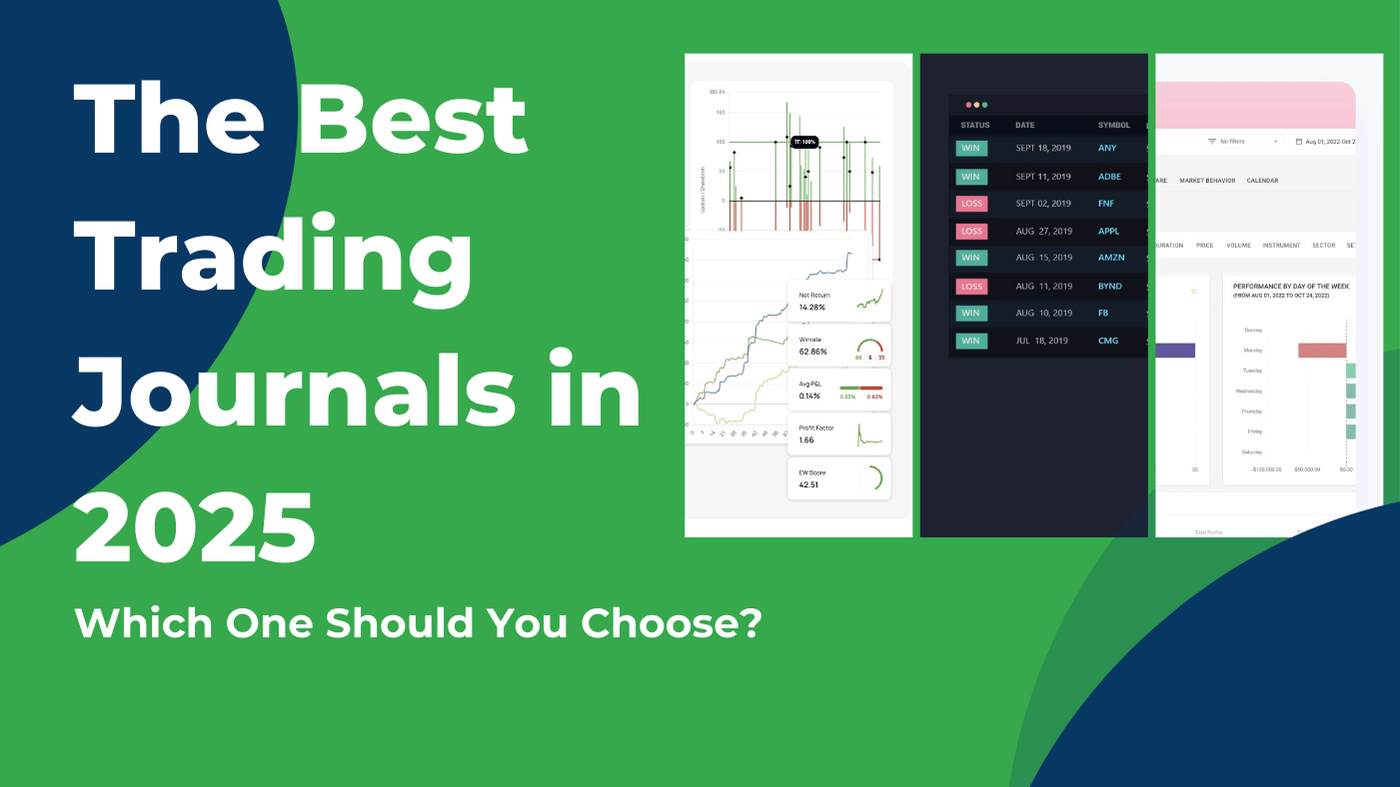
Choosing the right trading journal is essential for traders wanting to analyze performance, refine strategies, and improve consistency. In this...